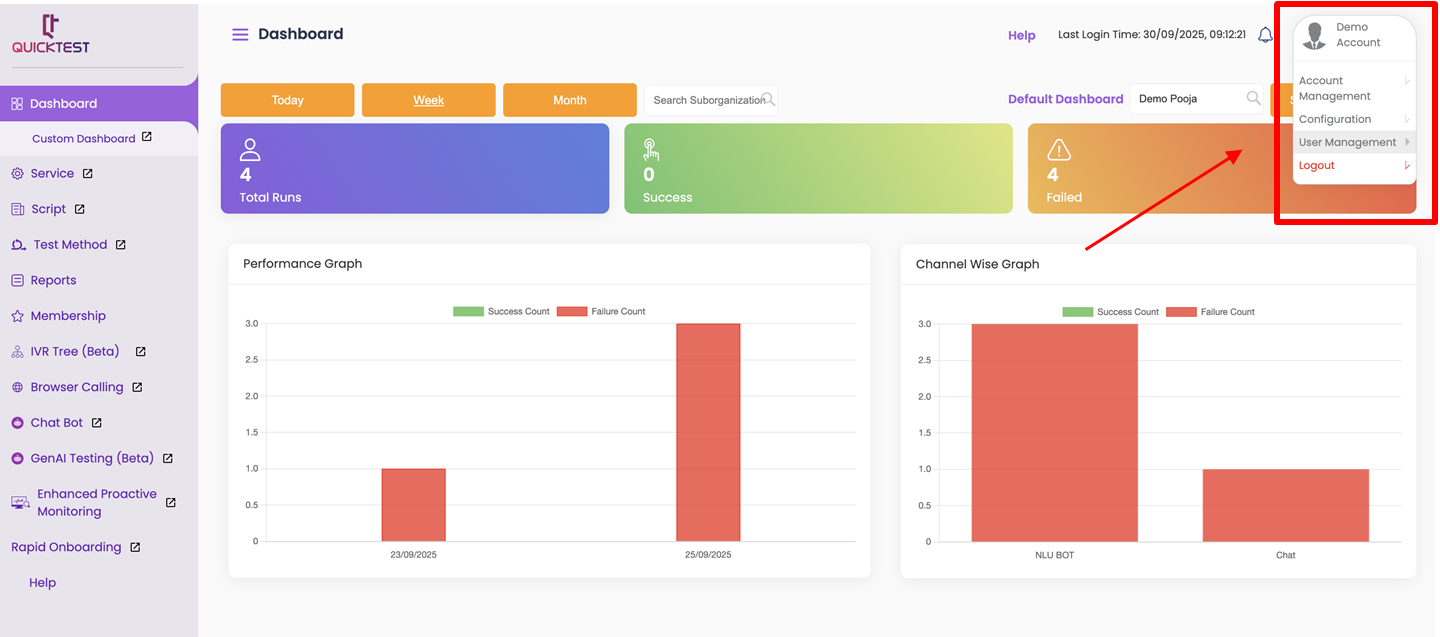
You can find details related to setting up new profiles, organizations and sub-organizations in the right top corner under Profile settings.
User Profile #
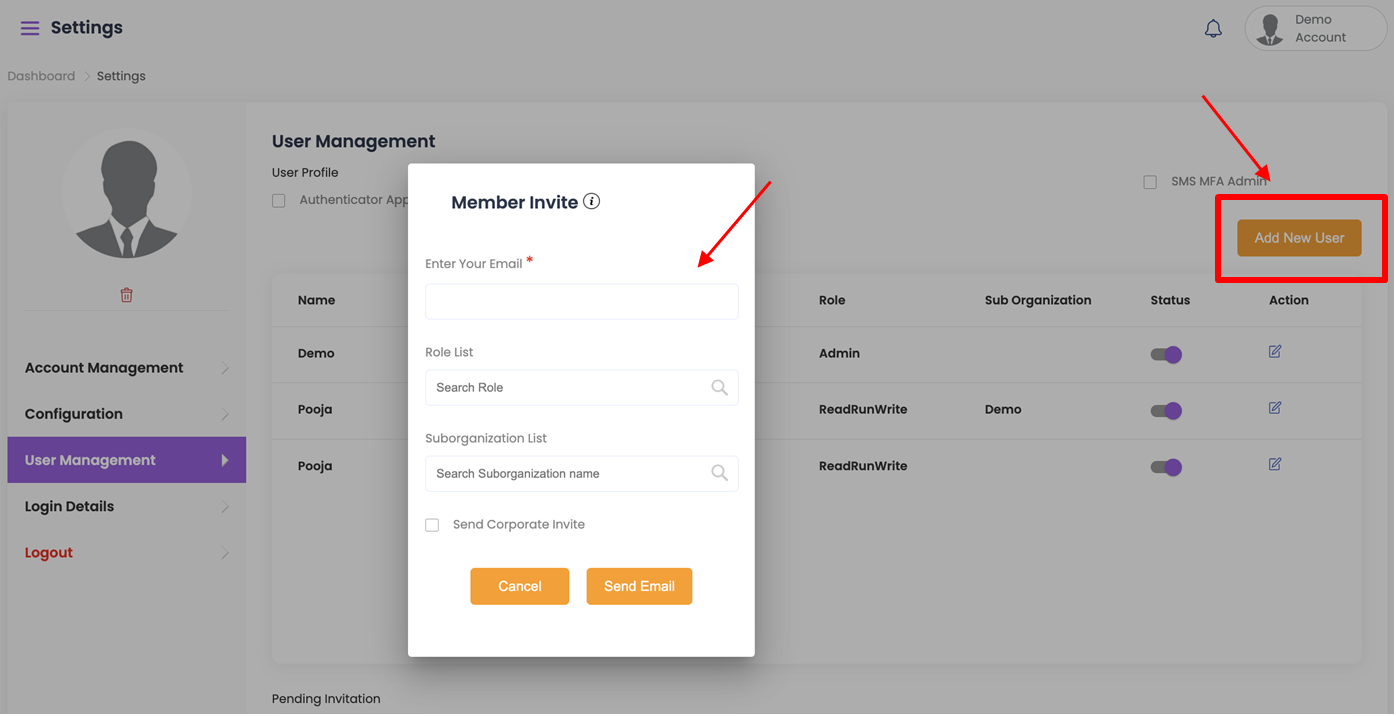
Adding or Inviting a New User
- Click Add New Member and enter the email address of the member to be invited.
- Alternatively, click Send Corporate Invite to allow users to log in with their corporate account.
- To edit a member’s access, select a role from the Role List:
- Read – User can only view information in QuickTest.
- ReadRun – User can run tests and view all information.
- ReadRunWrite – User can run and execute tests, and write/edit Services, Scripts, and Sprints.
- Admin – Has full access (ReadRunWrite) and complete control over QuickTest settings and user access. Admins are always at the main organization level, not sub-orgs.
- Select the Sub-Organization (if required) from the dropdown.
Note:
- Once registered, the admin can adjust the access level (ReadRun, ReadRunWrite, or Admin) and assign the member to a sub-organization if needed.
- The admin must send the invitation via QuickTest.
- The recipient must use the same email address to register. By default, recipients have Read-only access.
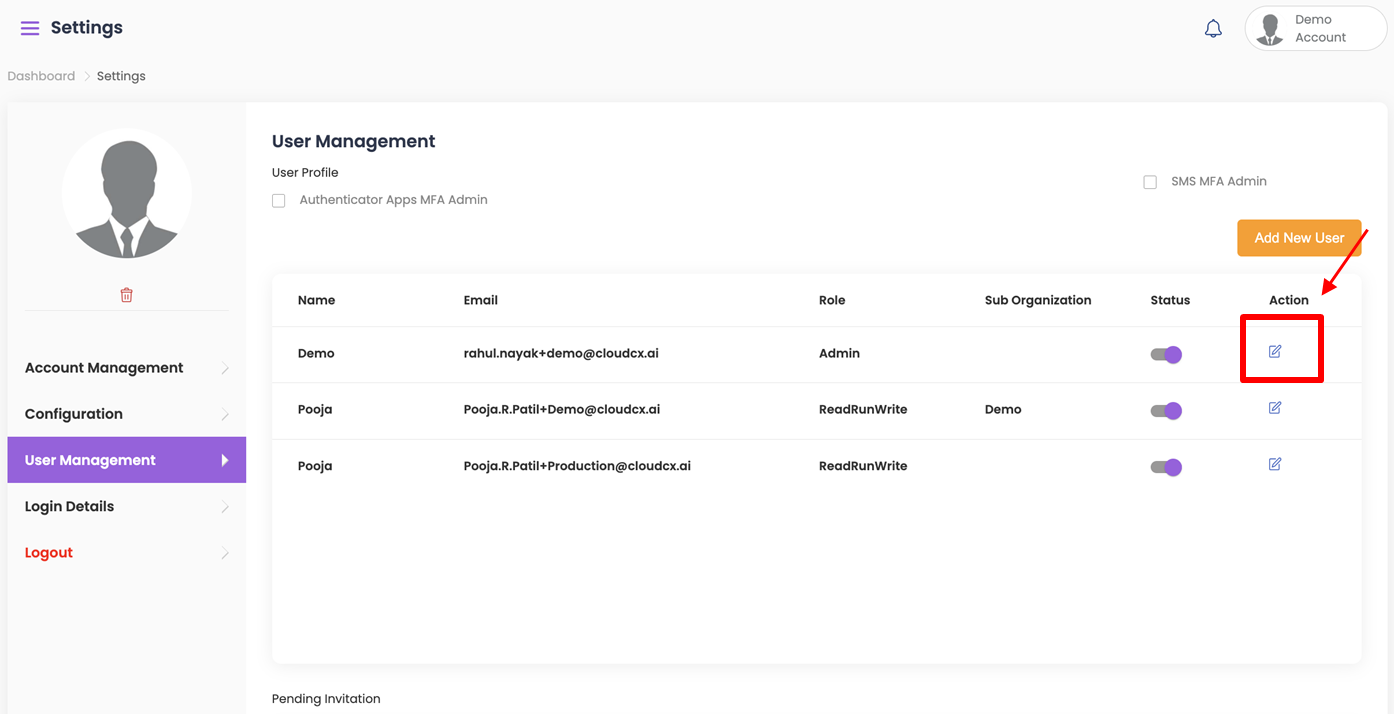
Managing Members
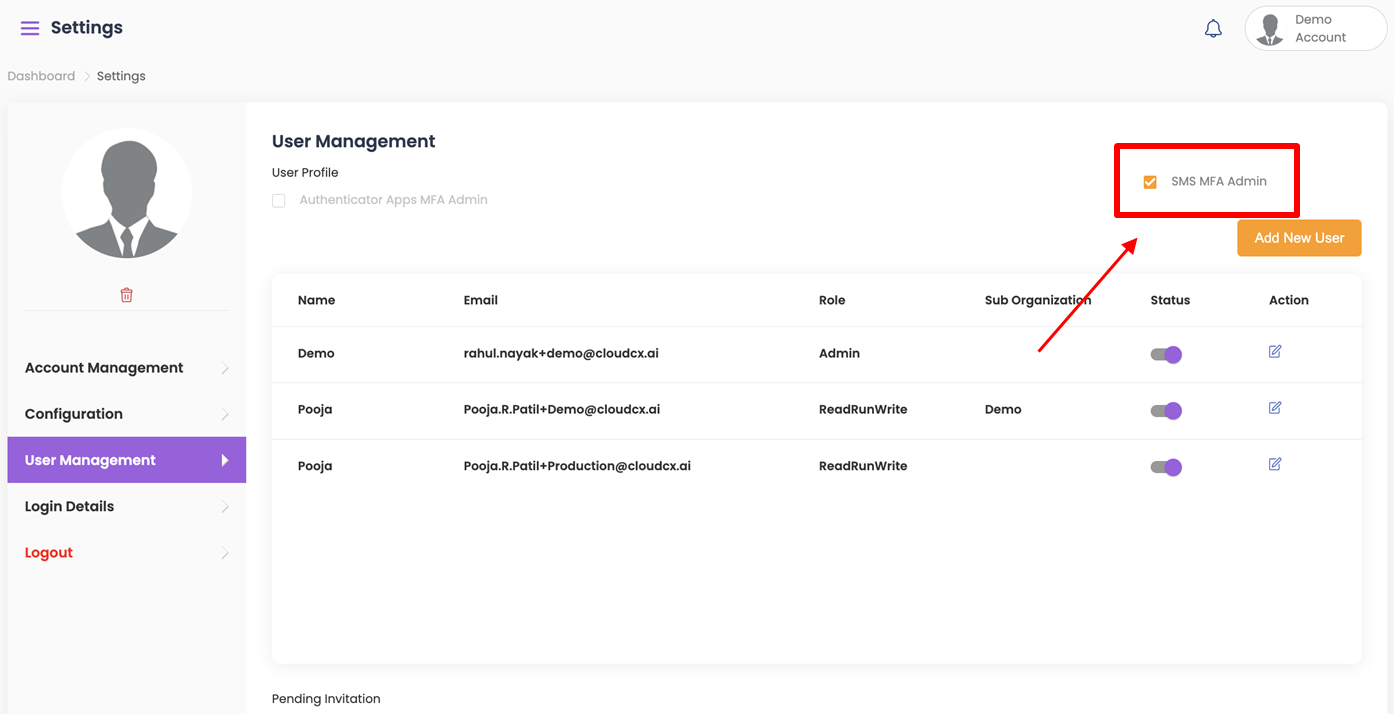
- A list of all members in your organization and sub-organizations appears in a list format, showing role, sub-org, and status.
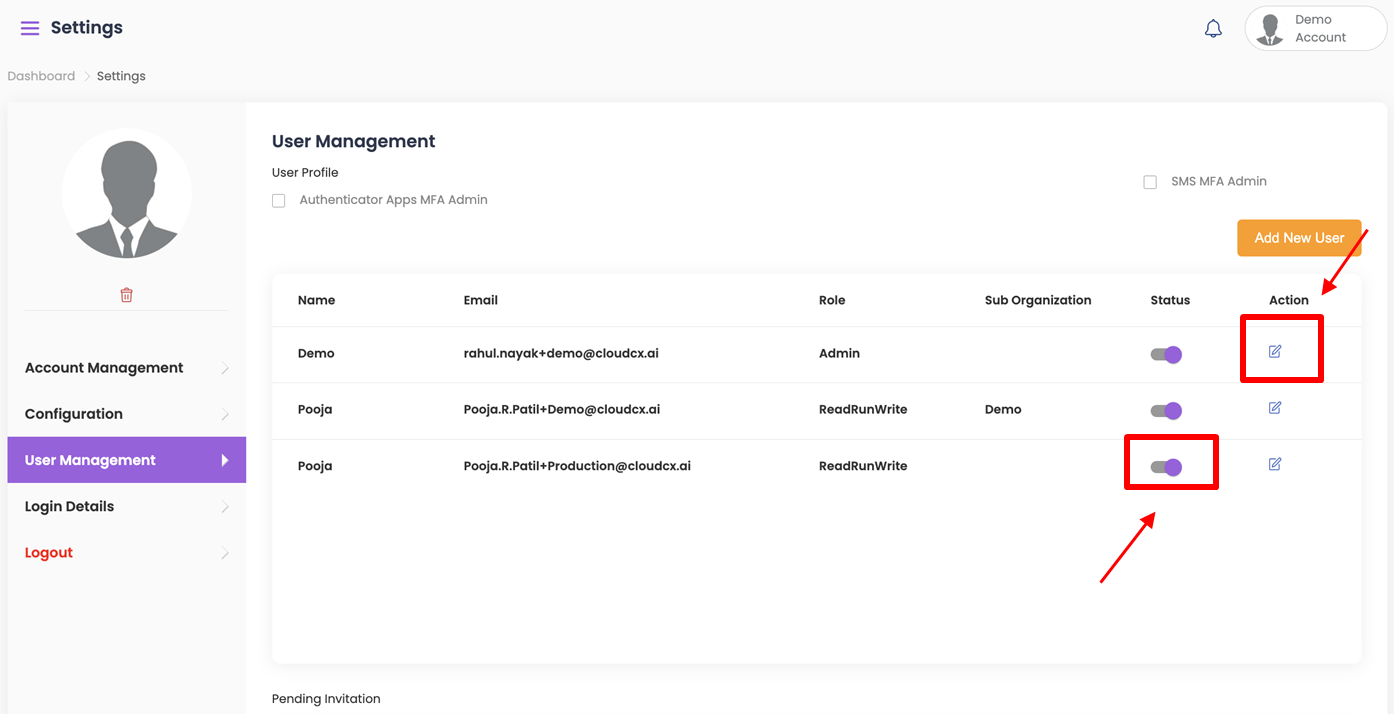
- To edit a member’s access, click the Action Icon next to their name.
- Use the Status Toggle to deactivate a member. Deactivated members cannot access QuickTest unless reactivated.
Enabling Two-Factor Authentication (2FA)
For extra security, SMS or Authenticator-based 2FA can be enabled for all members.
- Go to User Profile.
- Select SMS MFA to activate 2FA.
- An OTP (One Time Password) will be sent to your registered phone number.
- To receive the OTP on a different number, update your registered phone number in QuickTest.
- Click Update.
- Logout and log back in to QuickTest. You will now be required to enter the OTP during each login.
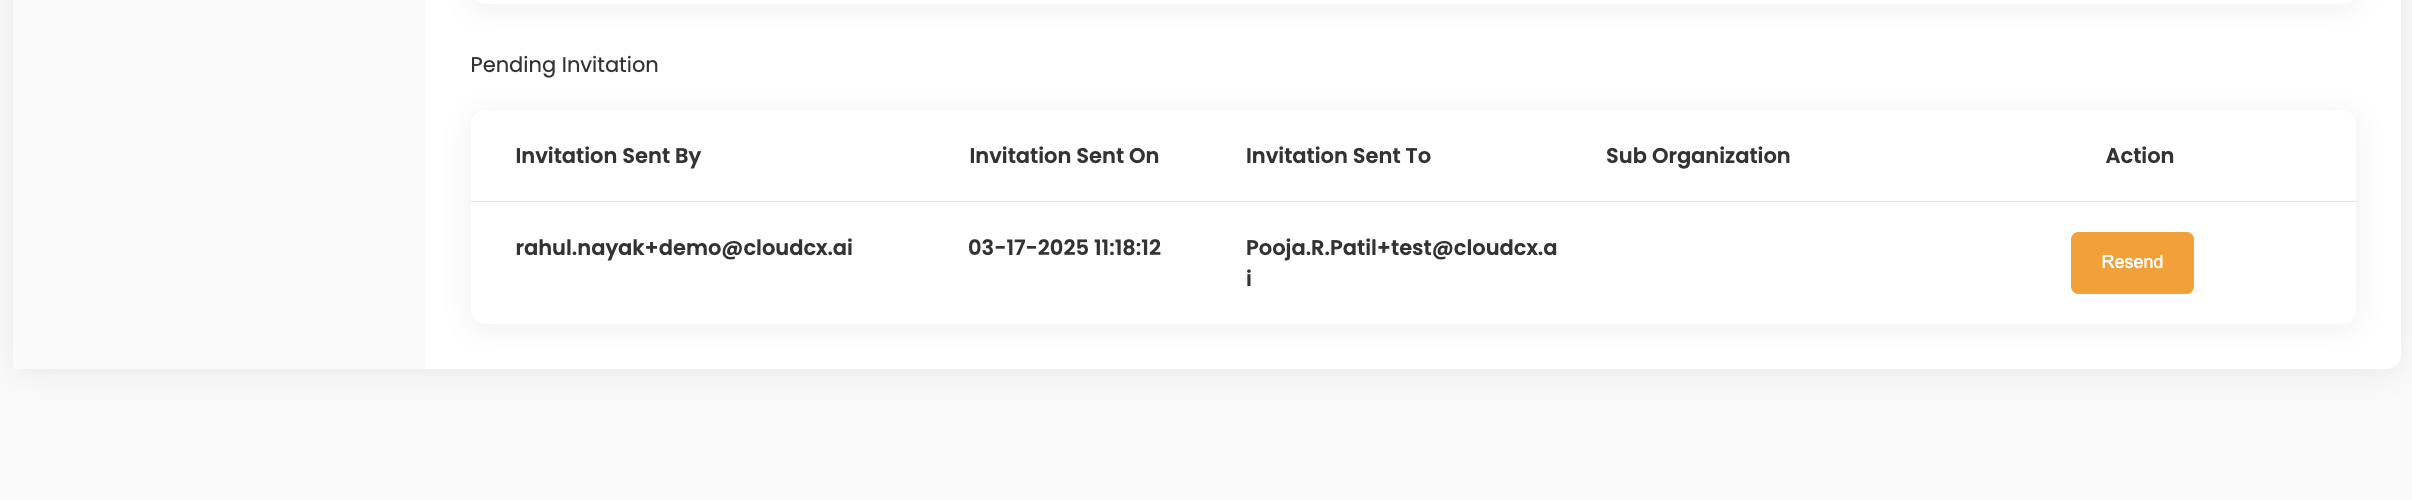
Pending Invitations
- Displays all users invited to QuickTest who have not yet registered.
- You can Resend Invitation by clicking the Resend button next to their name.
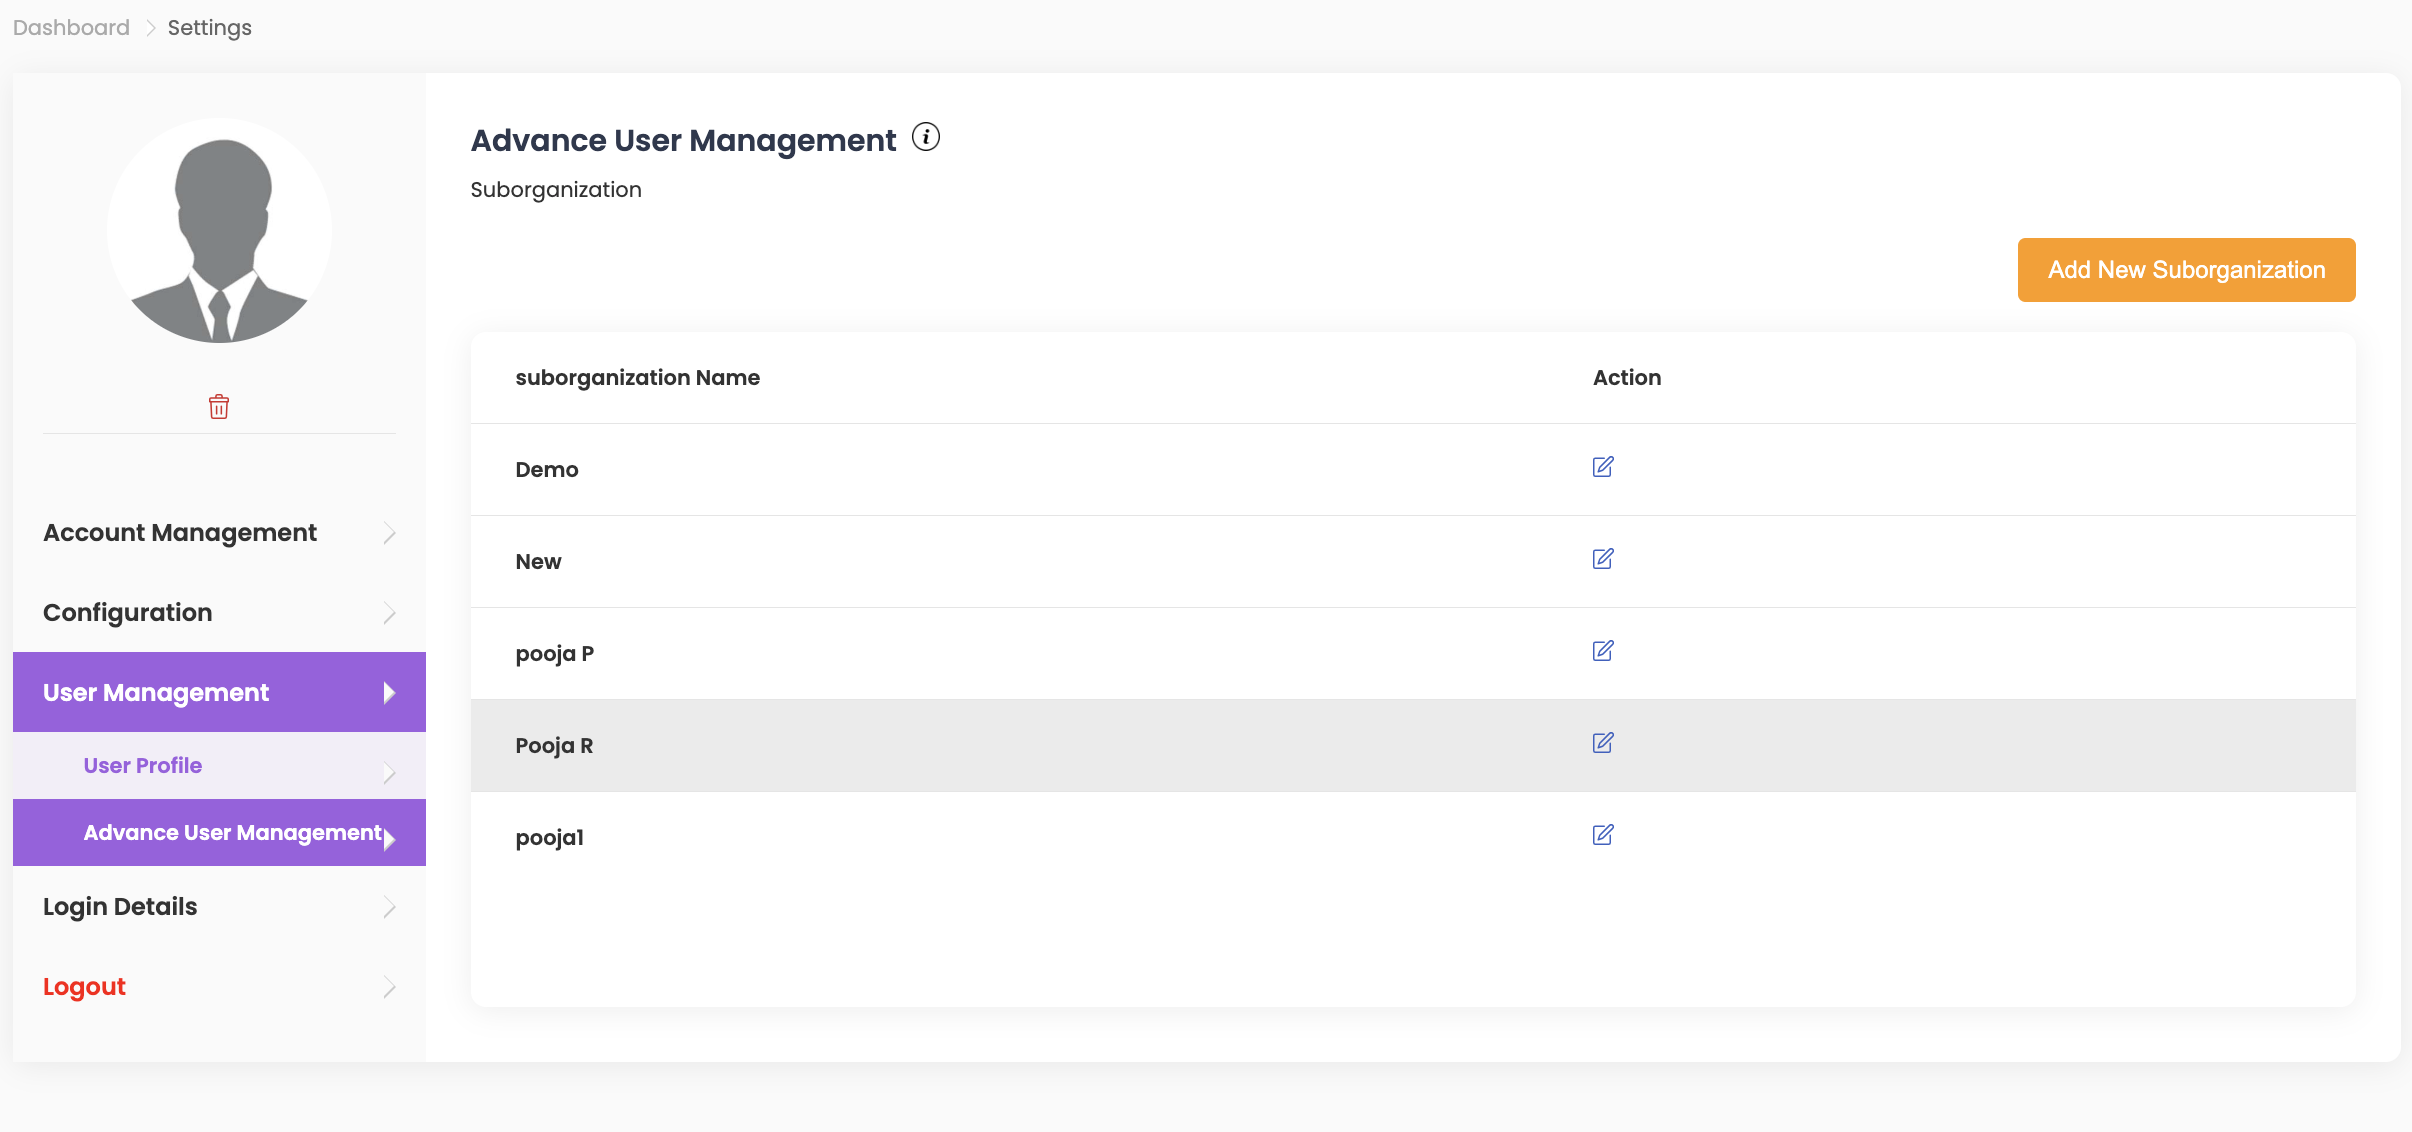
Advance User Management #
Admins can create sub-organizations for teams, departments, or other organizational units.
Creating a Sub-Organization
- Click Advanced User Management.
- Select Add New Suborganization and enter the name.
- Enter Allowed Interactions, which defines the number of test interactions allocated to the sub-organization.
Note: If a sub-organization reaches 100% of its allocated interactions, they cannot perform additional tests unless granted extra interactions by an Admin.
Assigning Members to a Sub-Organization
- Go to User Management.
- Under the Action column, click the Edit Icon next to the member’s name.
- Select the Suborganization List from the dropdown to assign the member to a sub-organization.