Load Testing Overview #
Load Testing in QuickTest simulates multiple concurrent interactions (calls, chats, or bot conversations) with your contact center to measure system behavior under heavy usage. It helps you validate performance, identify bottlenecks, and ensure stability before live customer traffic.
Creating a Load Test Sprint #
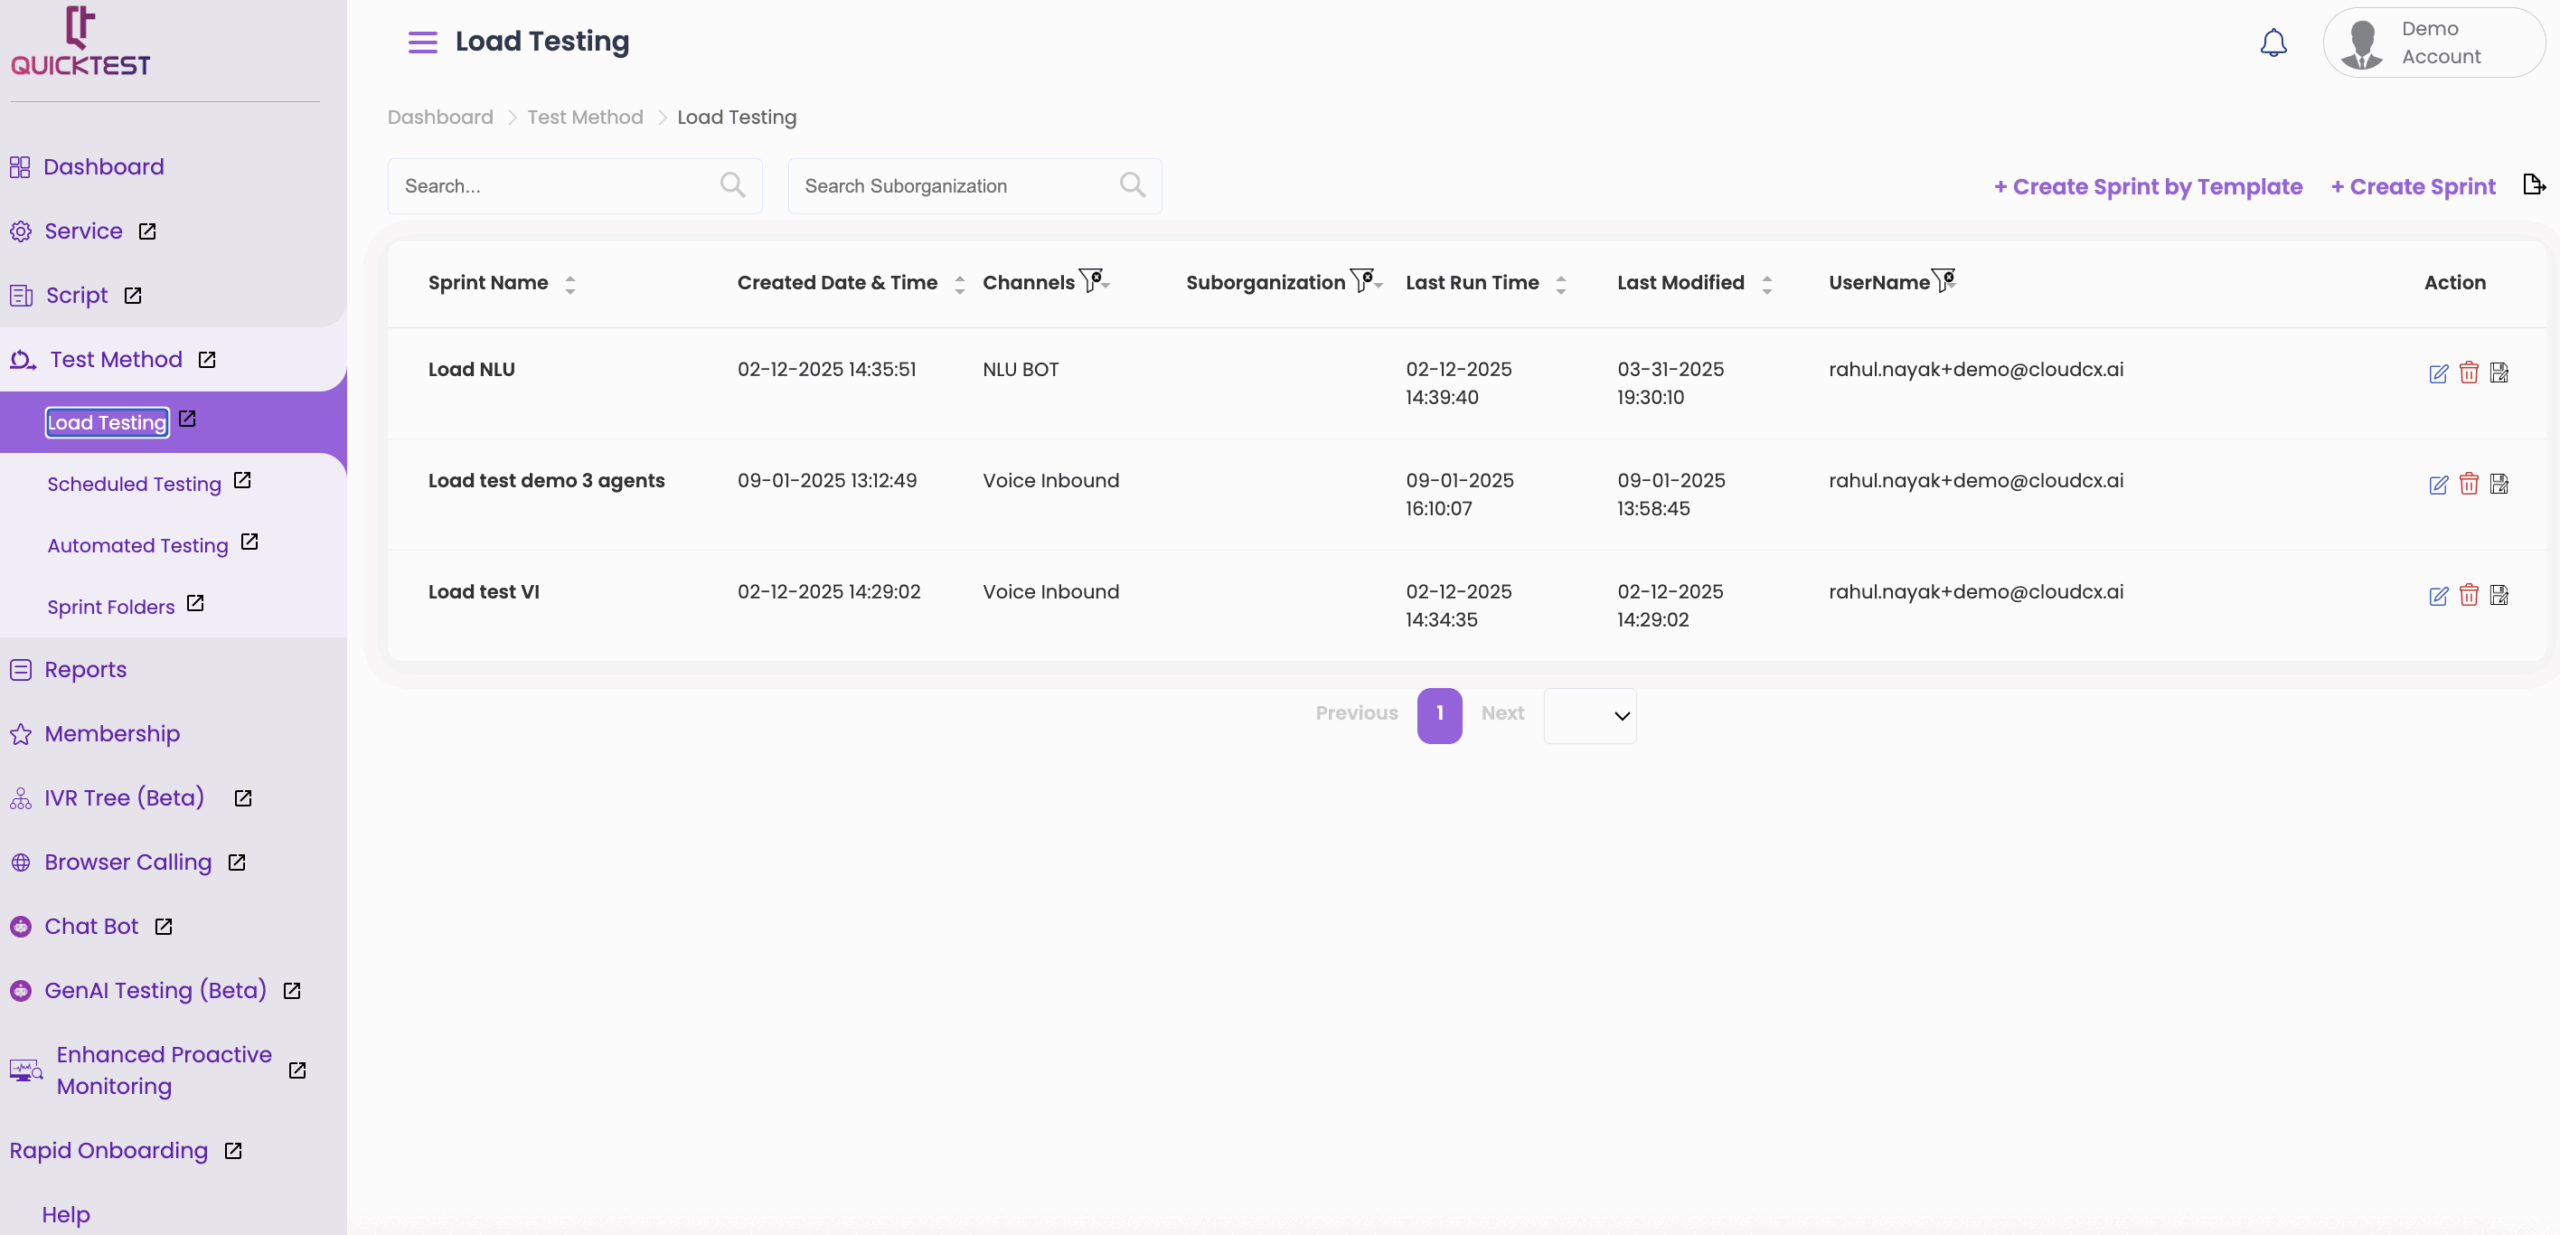
1.From the left column, click on Test Method.
2. Select Load Testing.
3. Click on + Create Sprint to create a new sprint.

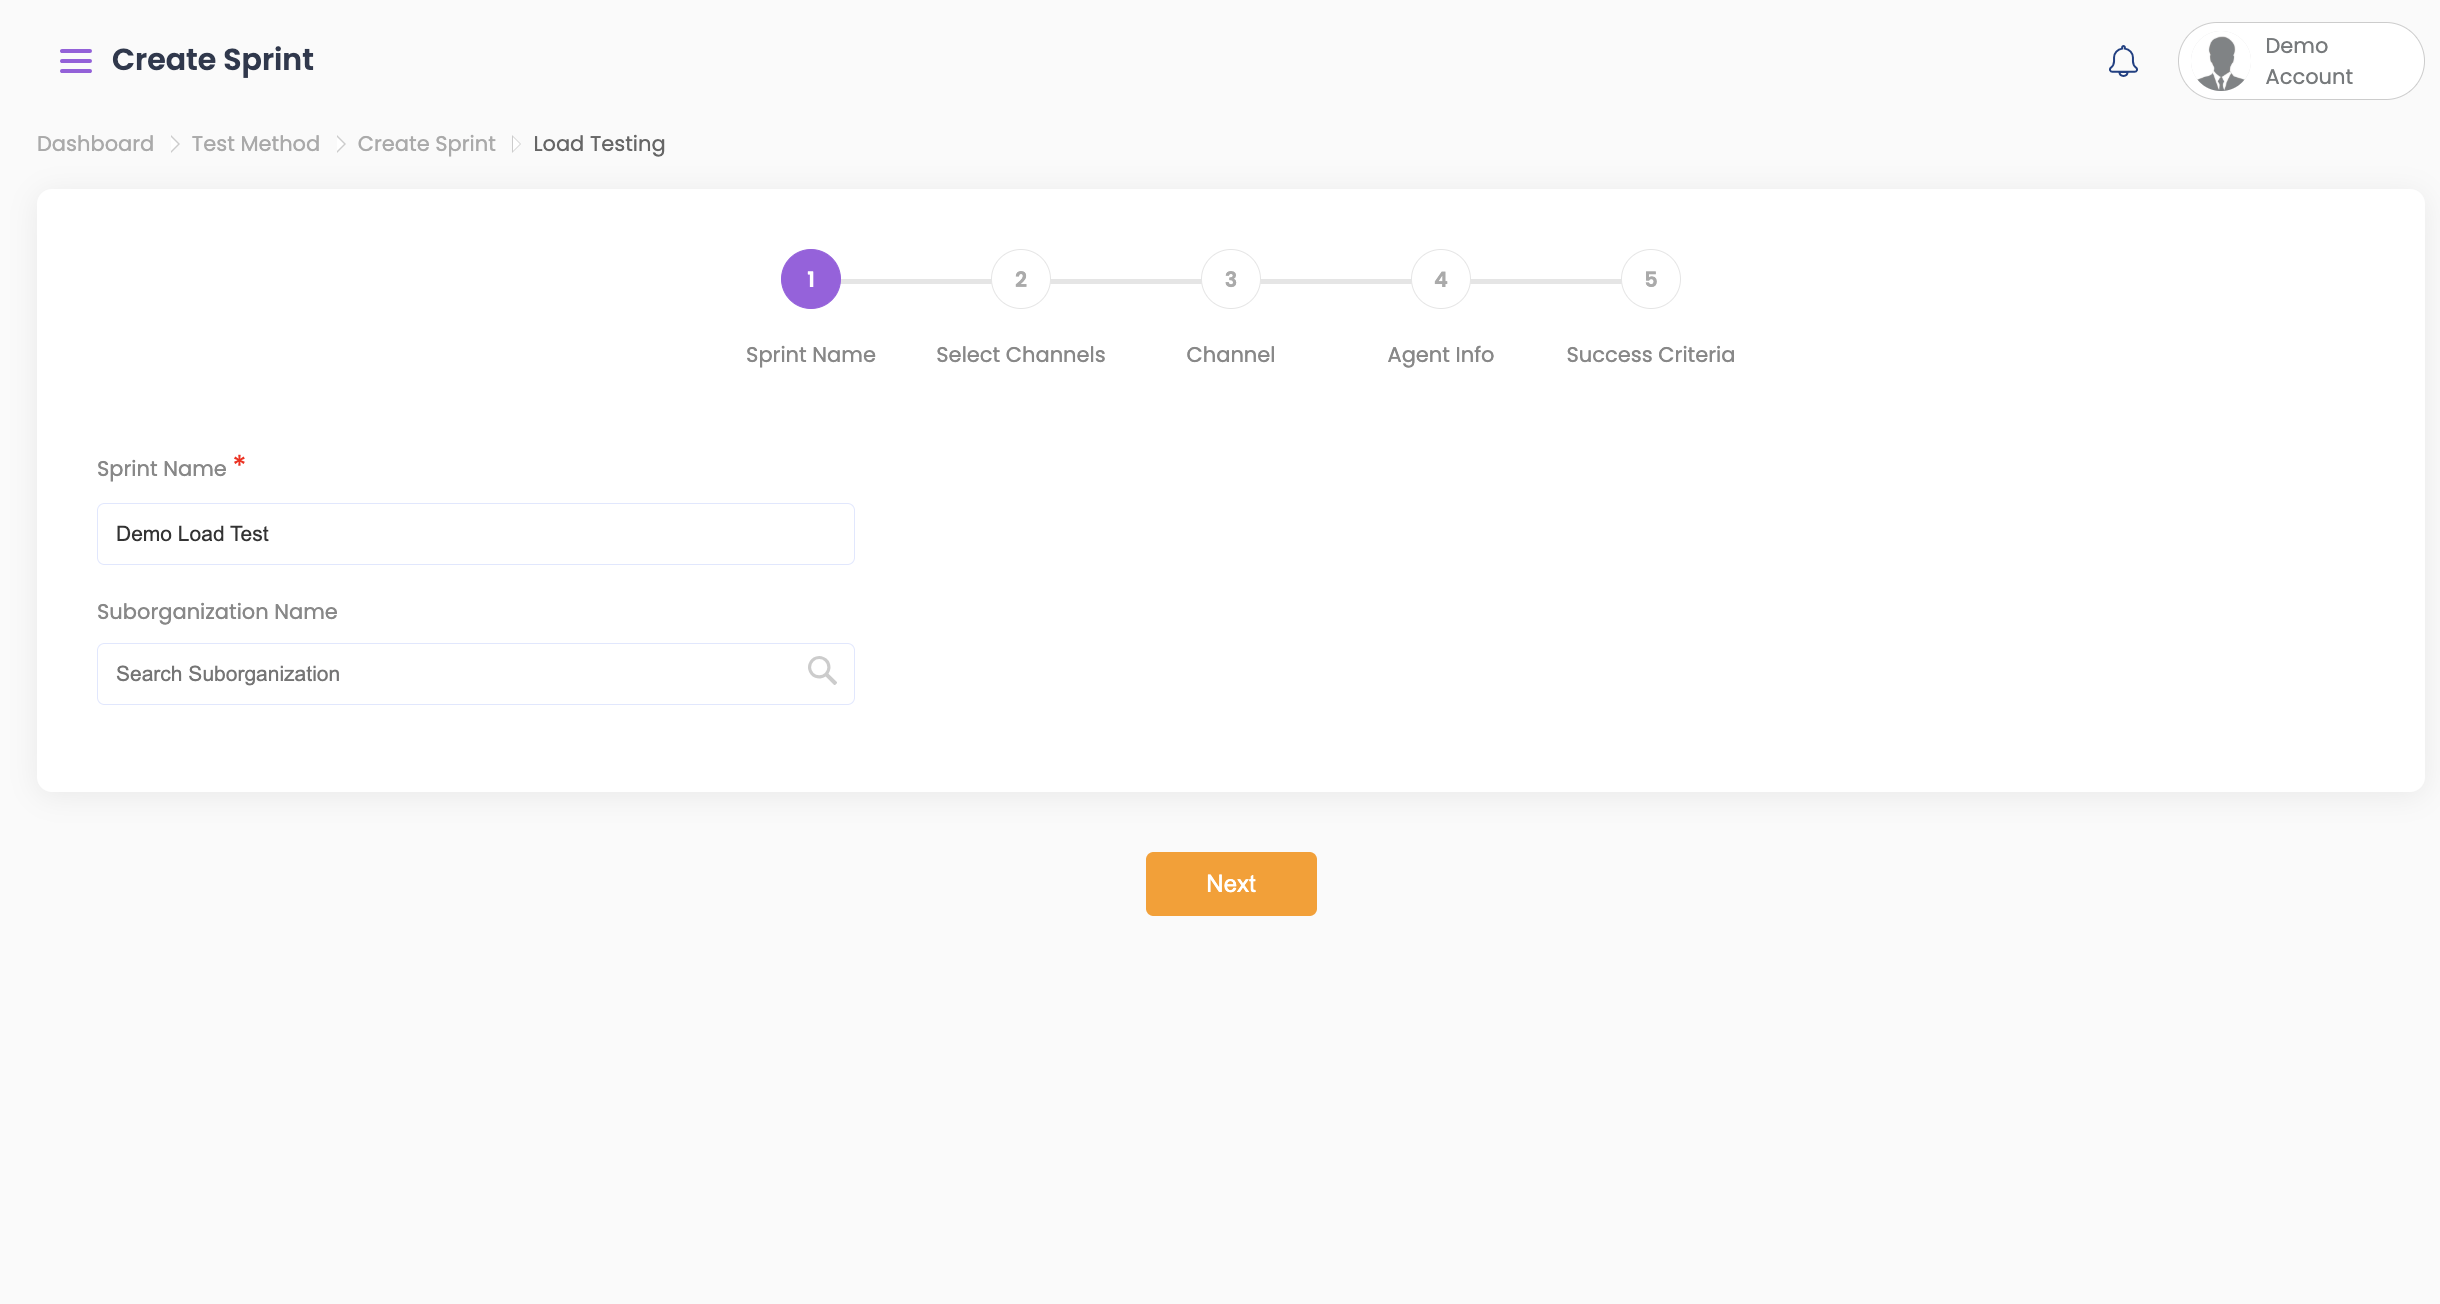
4. Enter a Sprint Name and click Next.
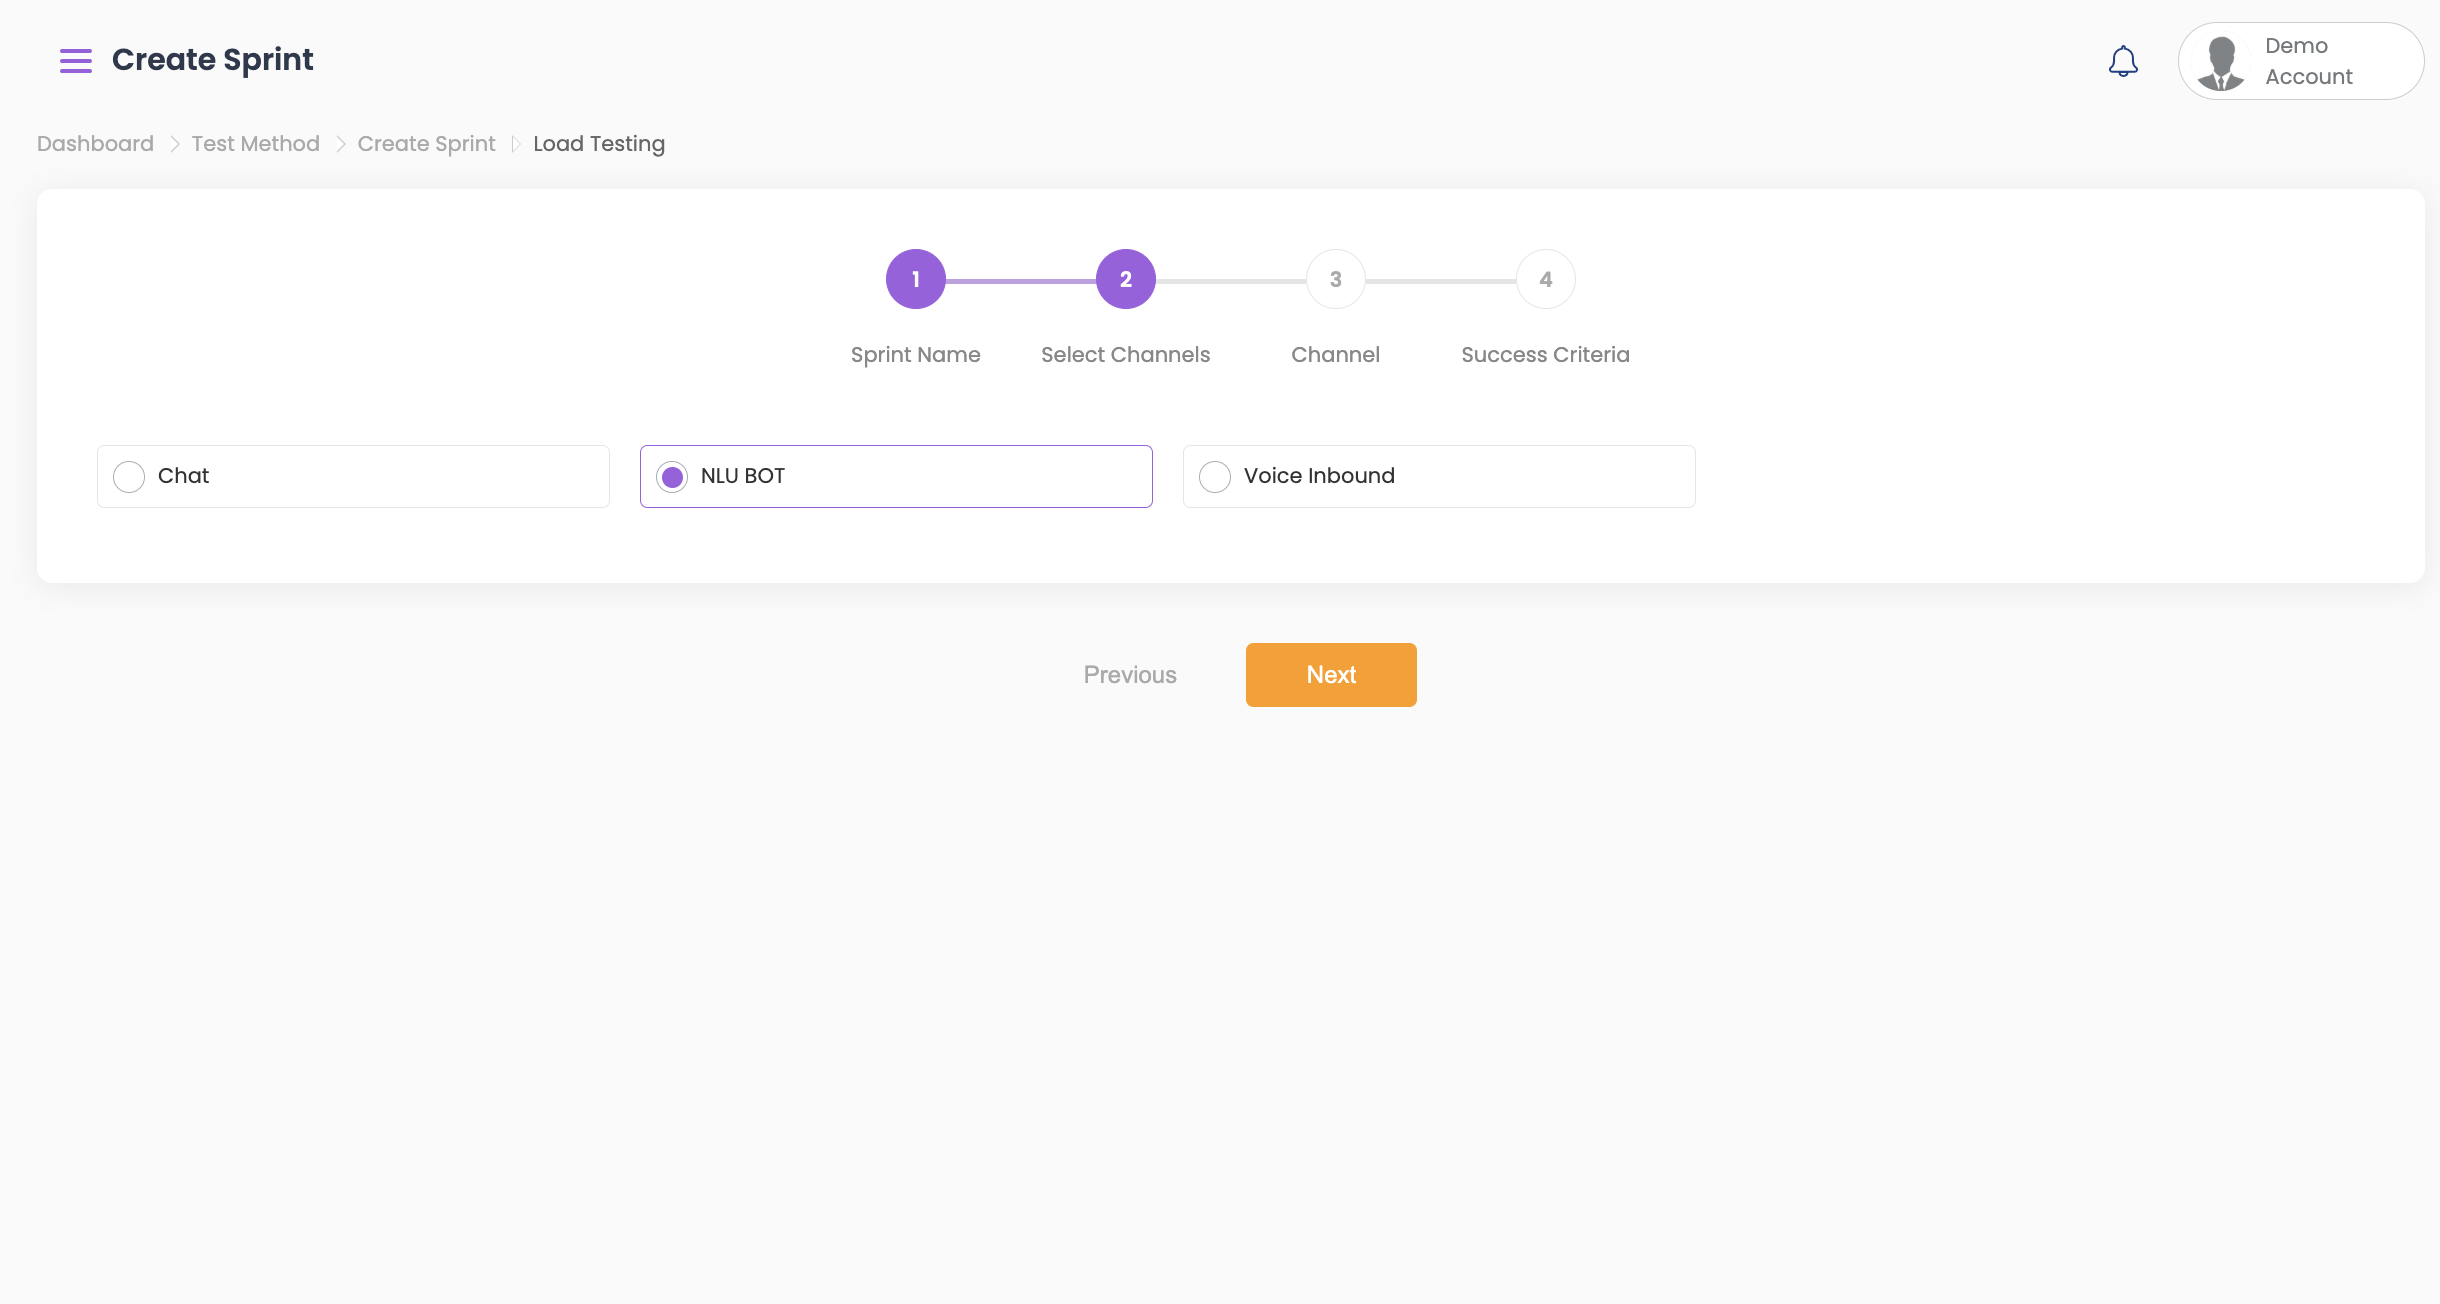
5. Select the Channel you want to test. QuickTest currently supports:
- Voice Inbound
- Chat
- NLU Bot
- Then click Next.
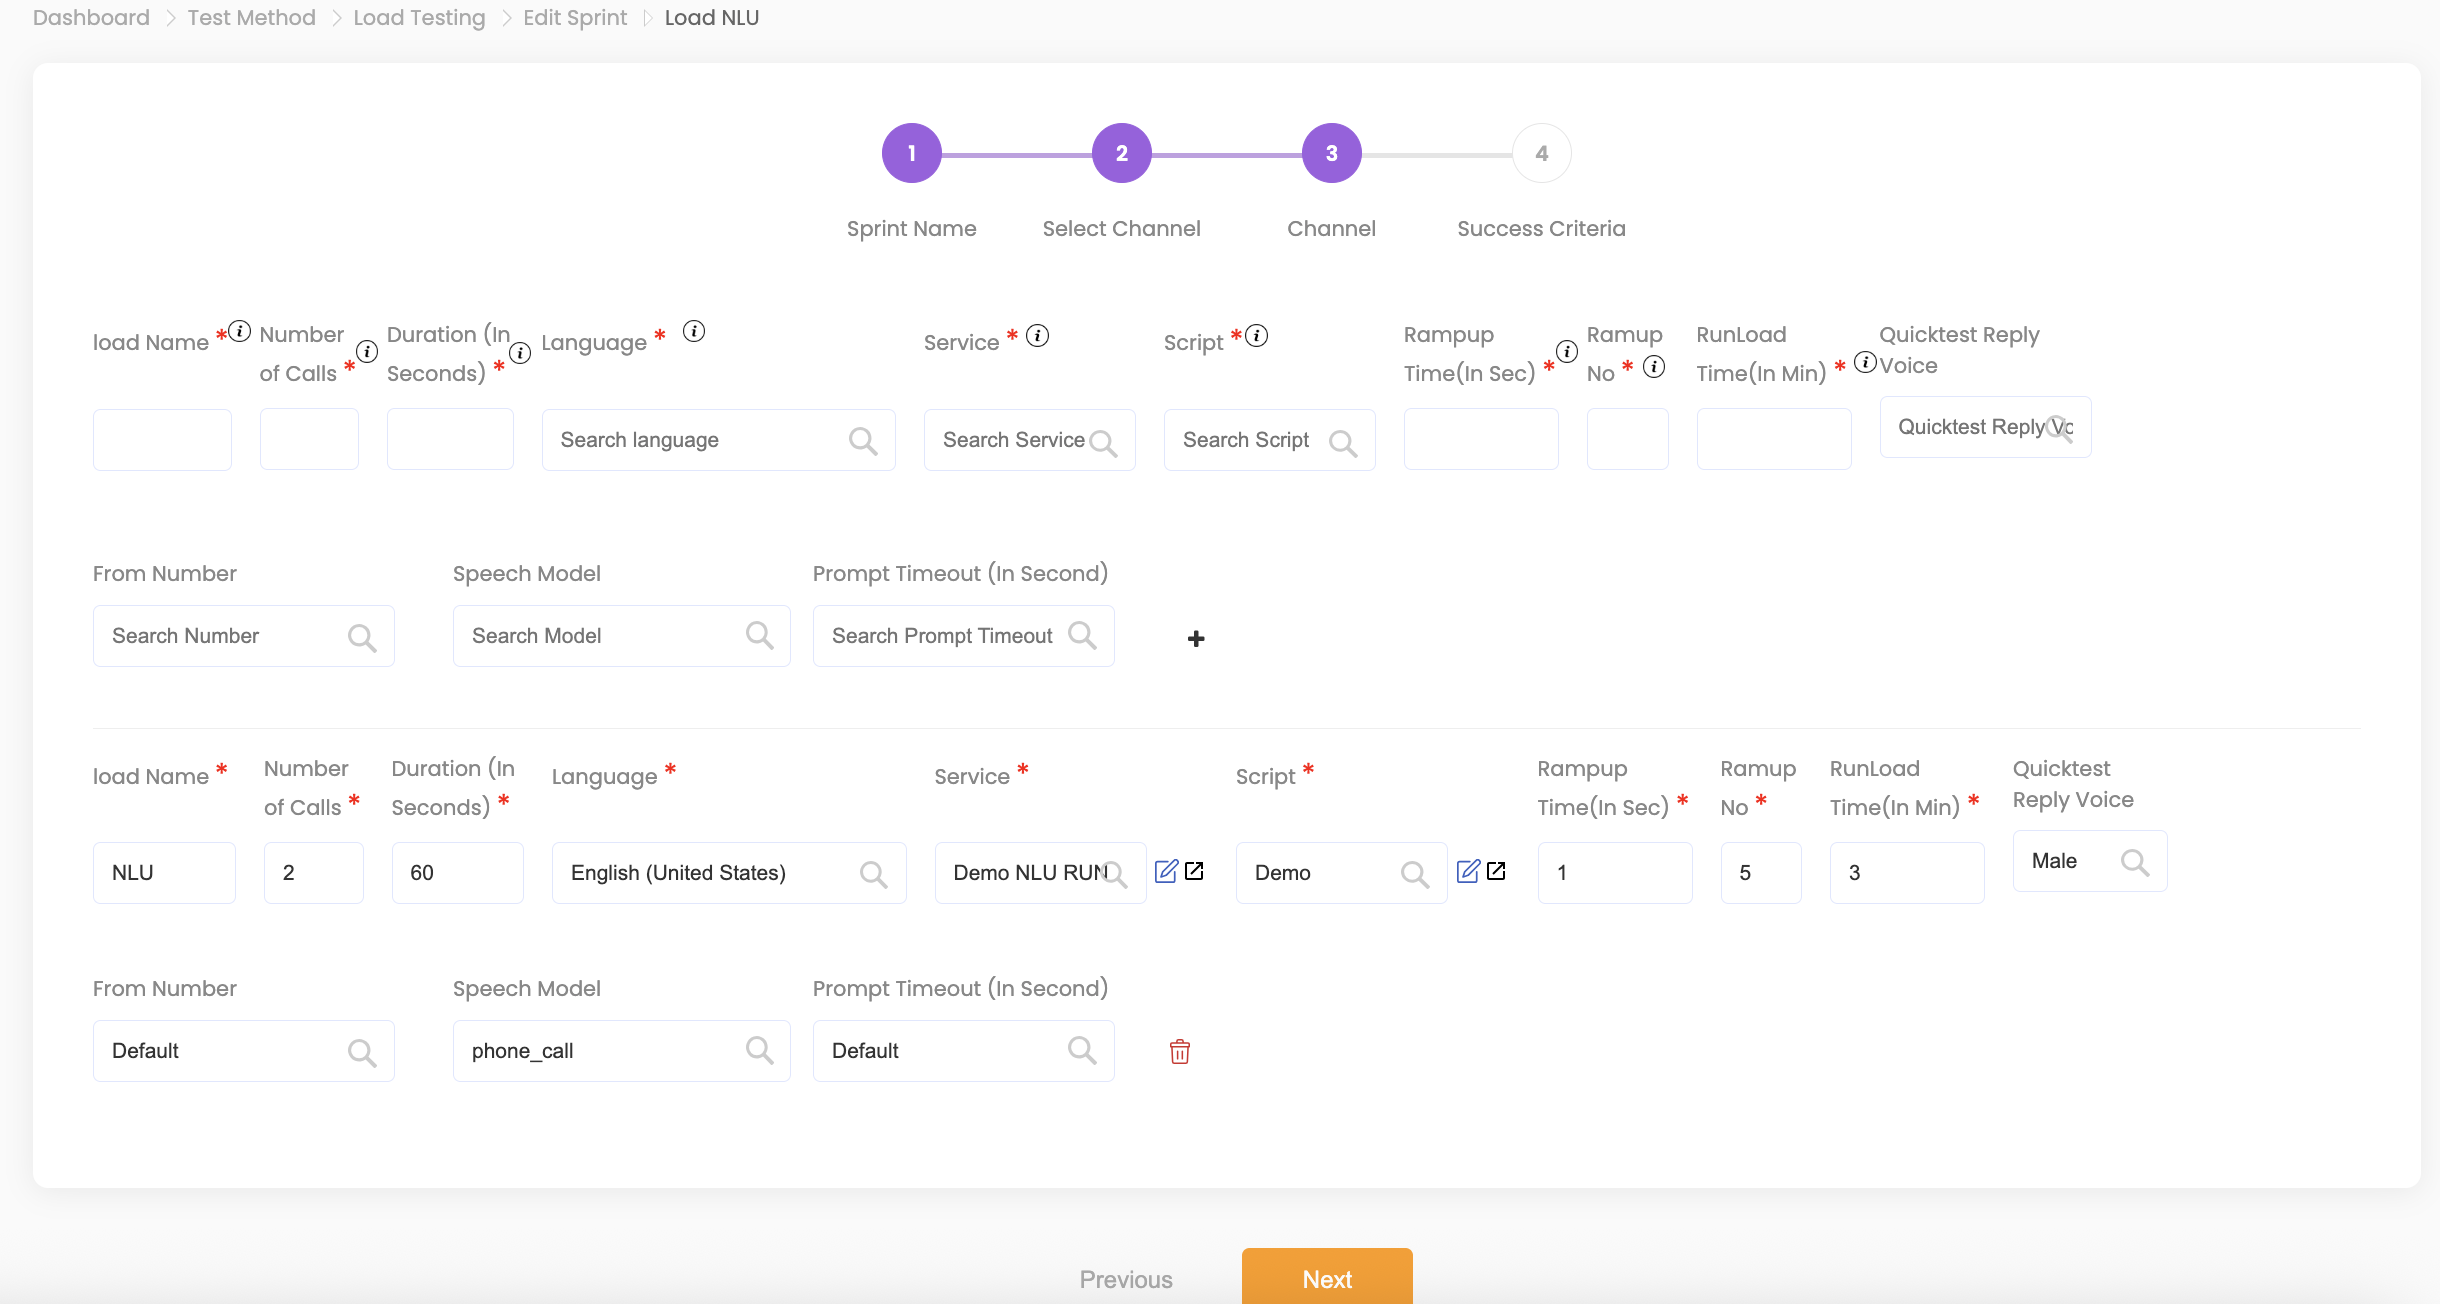
6. Enter the following Channel Details:
- Load Name: Name of the load test.
- Number of Calls: Total number of calls or interactions to simulate.
- Duration: Time period for each test. The test will terminate if the duration is exceeded.
- Language: Select the language from the dropdown options.
- Service & Script: Choose the previously created service and script.
- Ramp-Up Time: Time in seconds before additional calls are placed.
- Ramp-Up Number: Number of calls to increase per interval.
- Example: Number of calls = 100, Ramp-Up Time = 5 seconds, Ramp-Up Number = 10.
- Run Load Time: Duration to maintain maximum concurrent calls.
- Example: Maintain 100 calls for 5 minutes.
- QuickTest Reply Voice: Male, Female, or Default.
- From Number, Speech Model, Prompt Timeout.
- Click the + icon to add additional tests.
7. Click Next to set Success Criteria:
- Single Criteria: Determines if the test is successful based on one threshold.
- Multiple Criteria: Allows multiple conditions using AND/OR logic.
- Example:
(Confidence > 70 AND (Maximum Prompts is 8 OR Phrase Match is true)). - Use +criteria to add criteria and +criteriaSet to create rule sets with AND/OR conditions.
- Example:
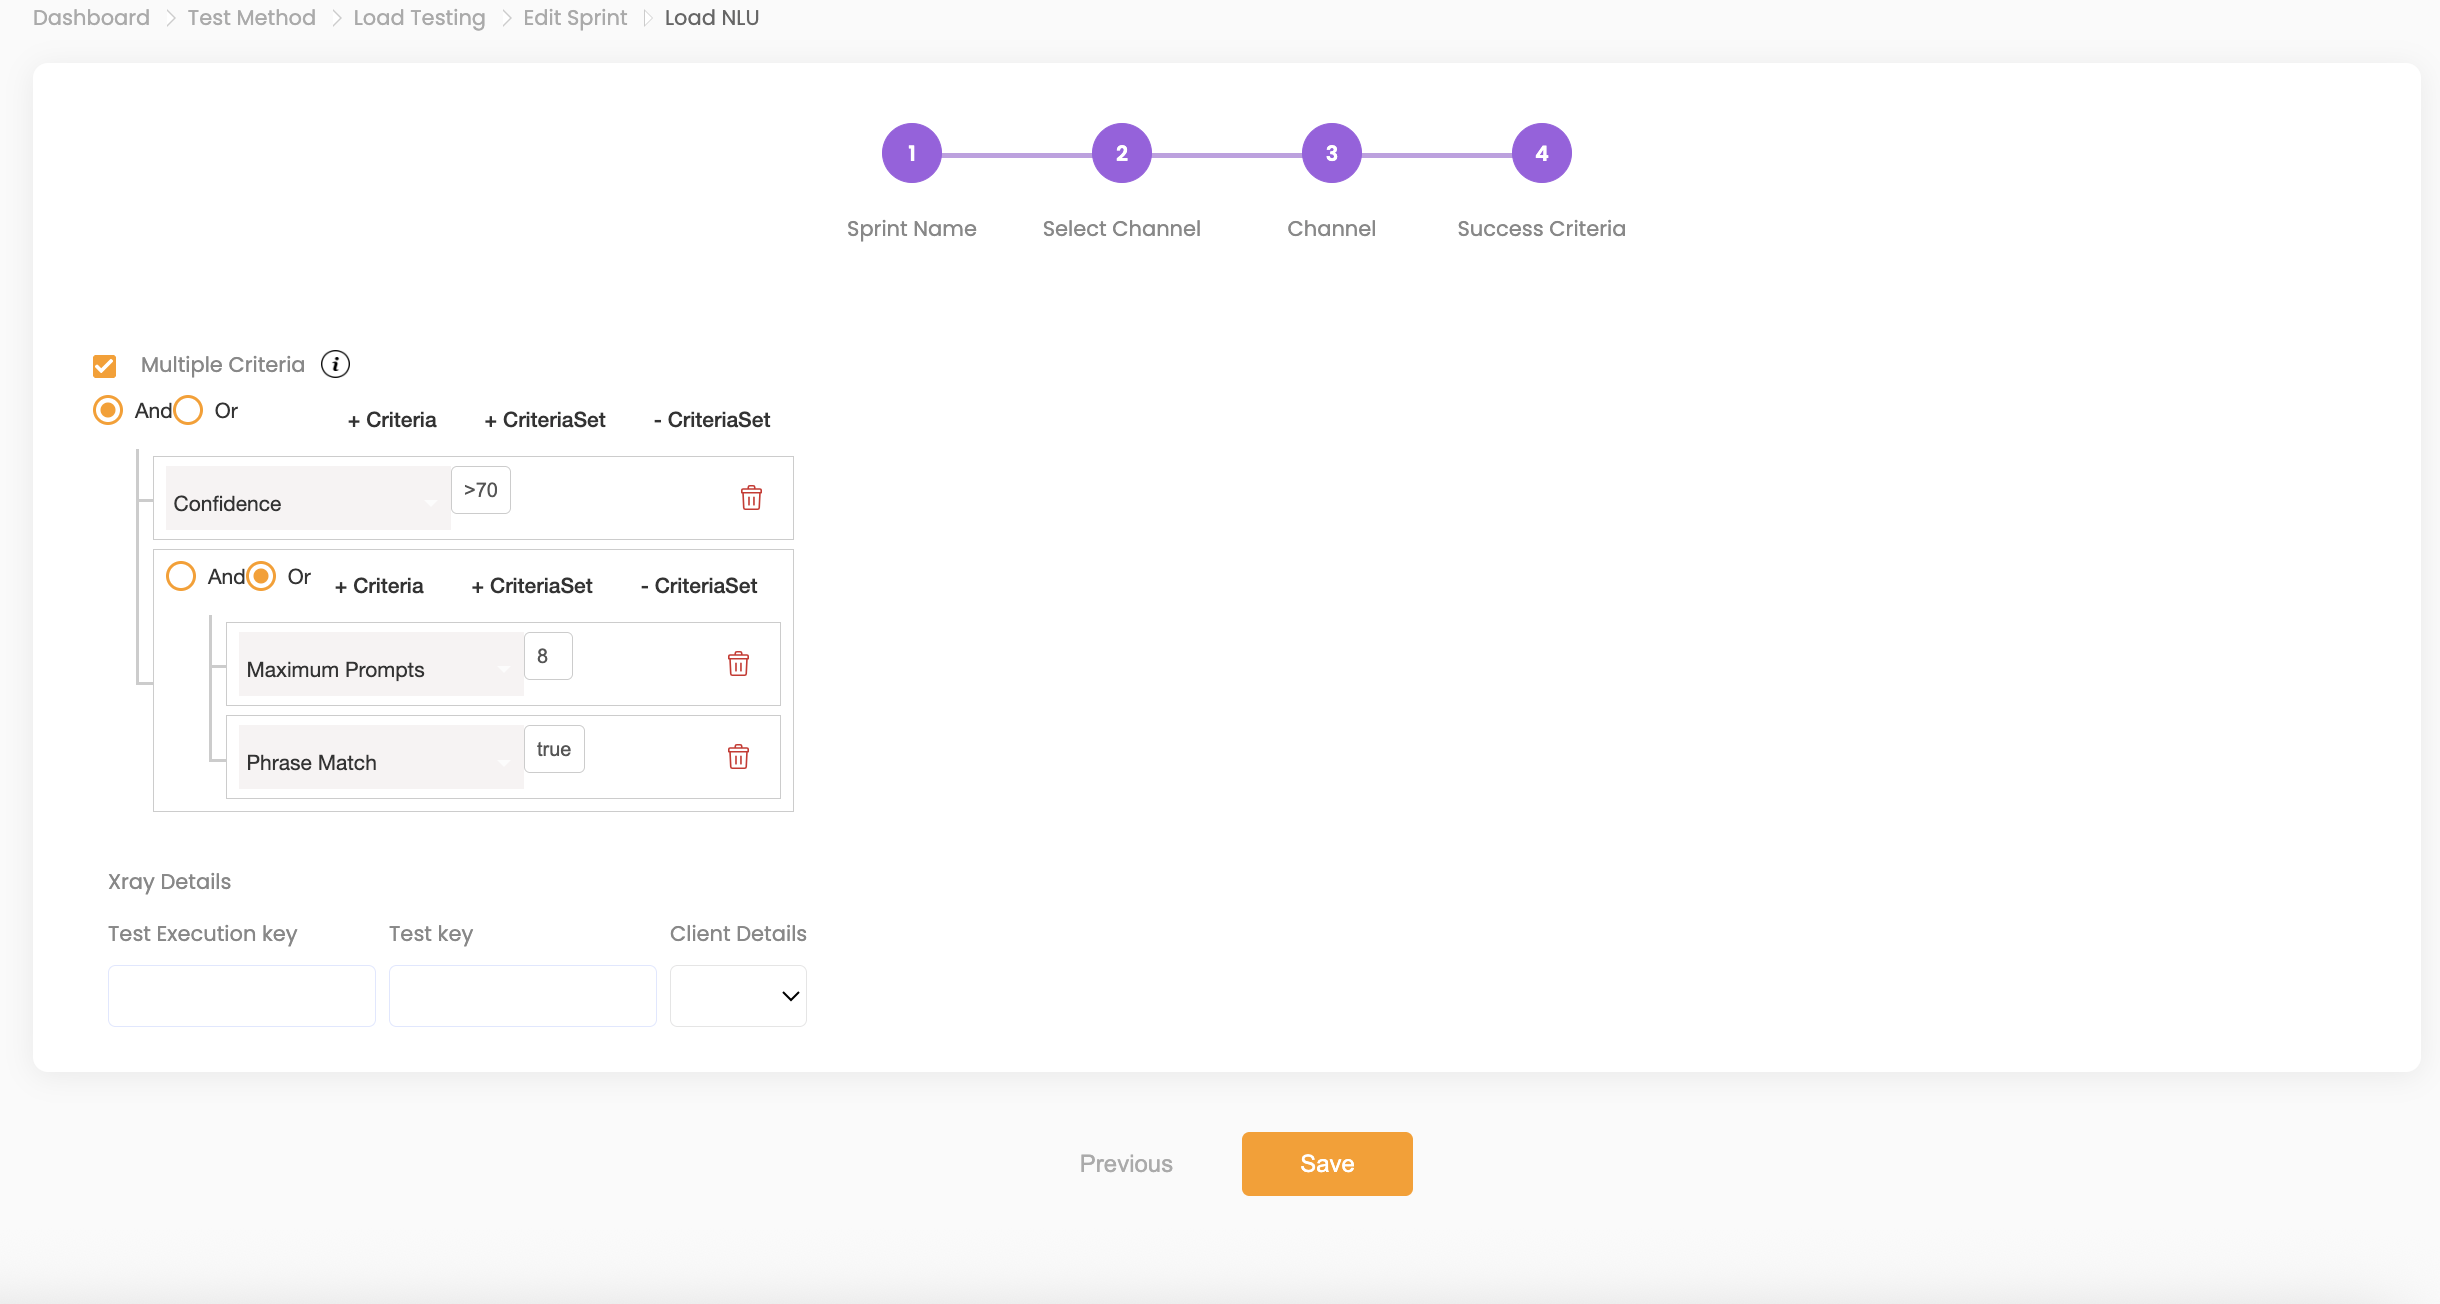
8. Click Save.
9. Choose to start testing now or later.
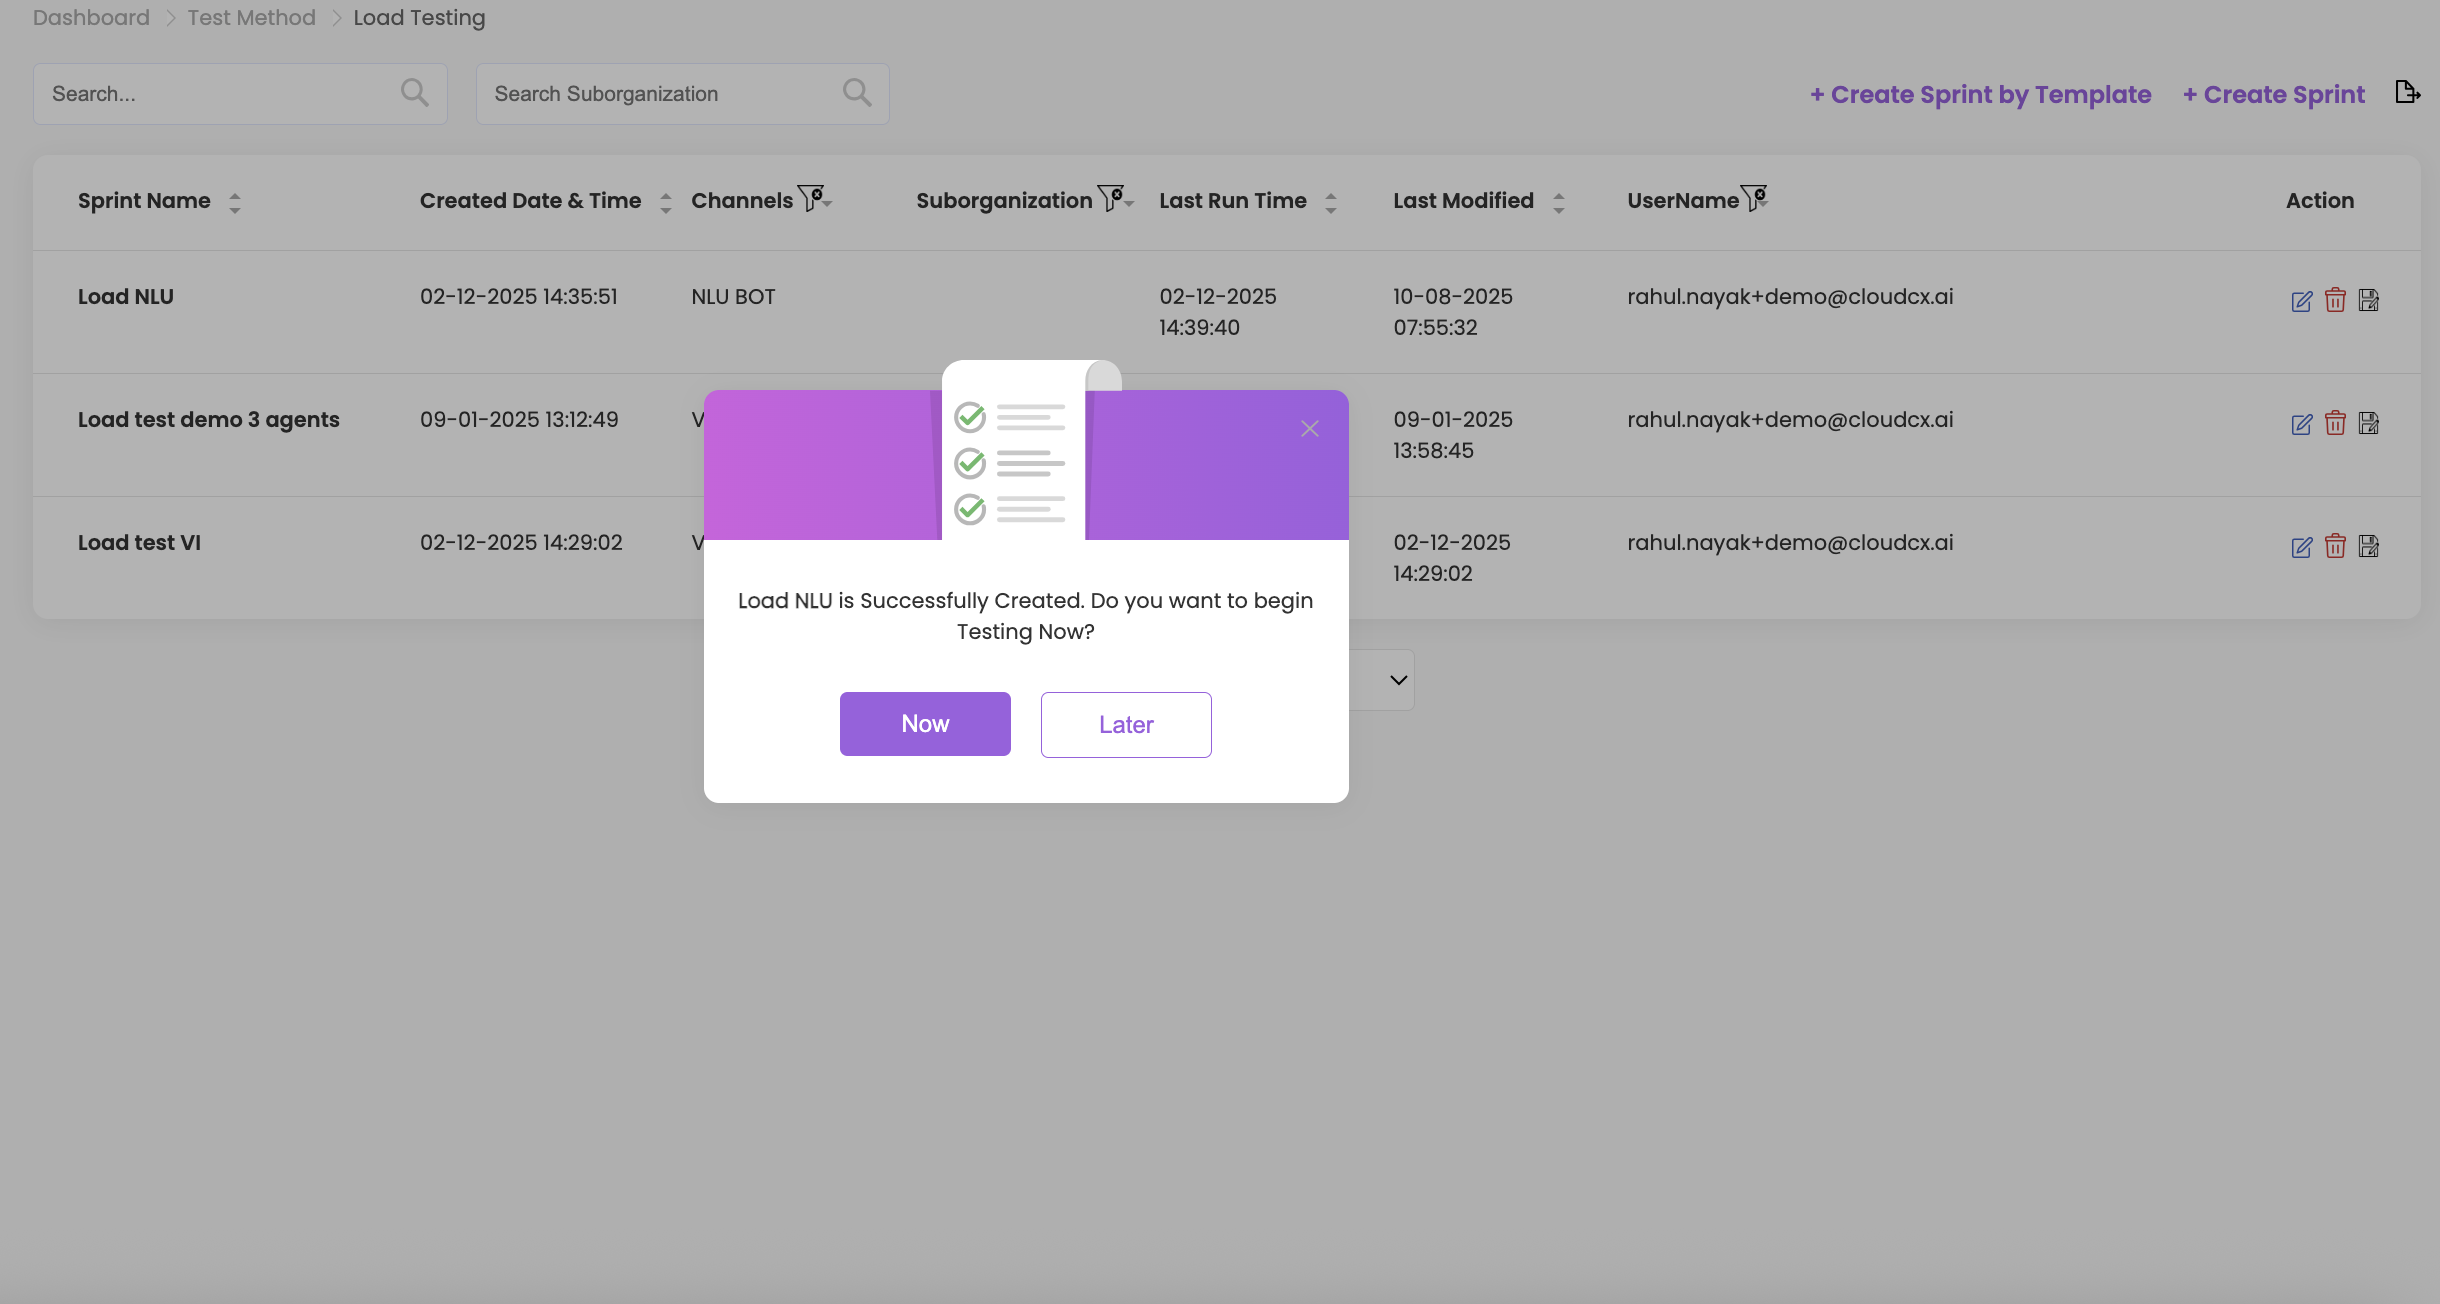
10.To run immediately:
- Click Now, then click Start.
- Test progress will display details in real-time.
- To stop the test, click Stop Test from the top-right.
Success Criteria Explained #
- Check Ringing: Verifies if the number is ringing after call initiation. Detects unreachable numbers, line disconnections, or misconfigurations without needing an answer.
- Time Difference: Measures the general response time; delays beyond this mark the test as failed.
- Time Difference Prompt Wise: Tracks response time at each individual prompt.
- Overall Confidence: Calculates combined confidence for the entire interaction.
- Prompt Level Confidence: Sets minimum confidence for each prompt; failure marks the test as failed.
- Single Prompt Confidence: If any prompt falls below the threshold, the interaction fails.
- Maximum Prompts: Detects loops, repeated prompts, or stuck IVR paths.
- Minimum Prompts: Ensures all expected prompts are delivered; fewer prompts indicate possible early call drops or misrouting.
- Custom User Data: Validates dynamic user data (names, account numbers, zip codes, etc.) in the IVR flow or after connecting to an agent.
- Phrase Match: Confirms whether expected phrases appear exactly as scripted. Critical for compliance and legal requirements.
- Agent Login: Validates if the agent is logged in.
- Agent Answered: Validates if the agent answered the call.
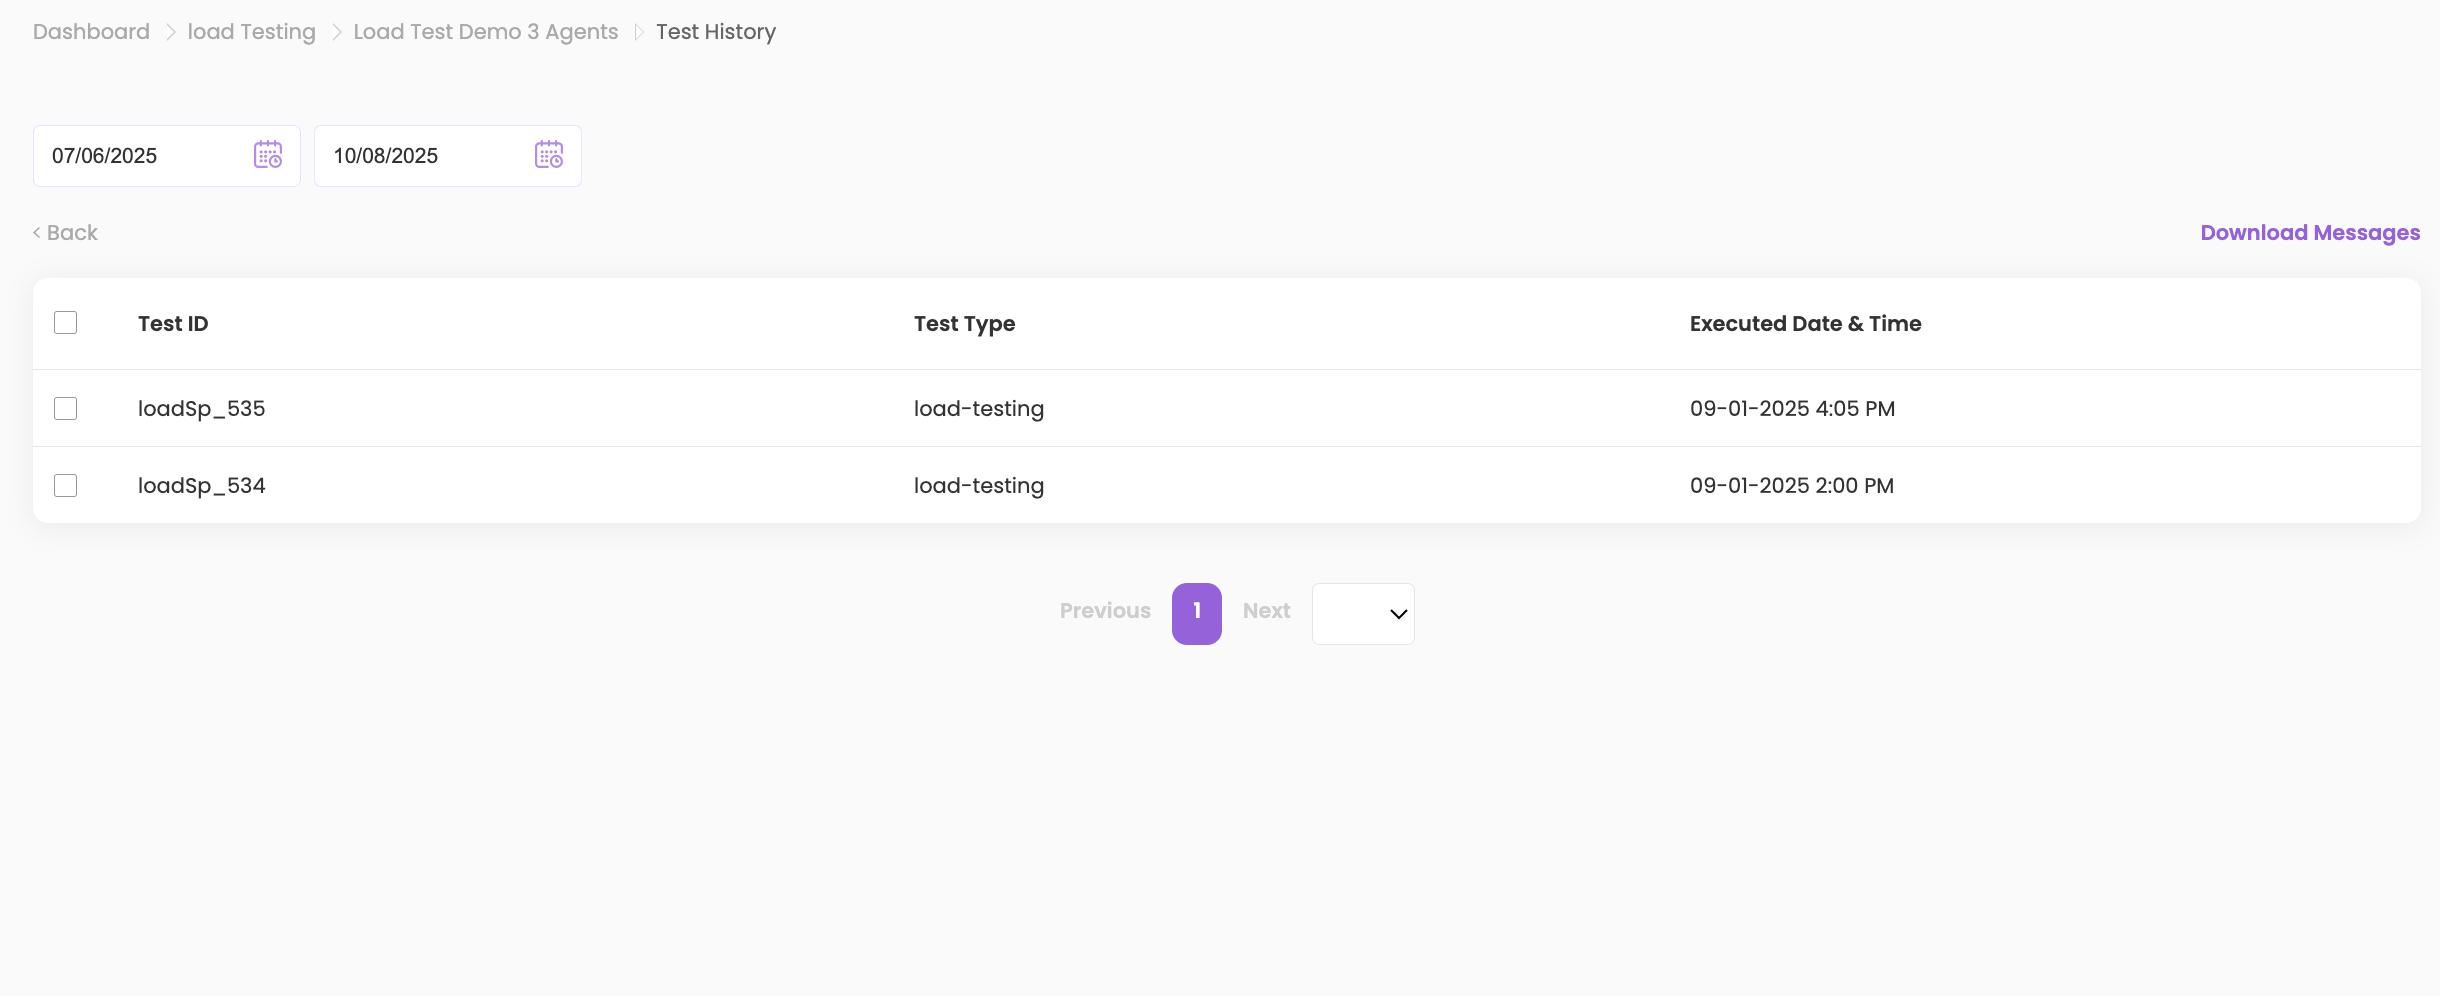
Viewing Load Test History #
1. Click on the Sprint Name to view the test history. The following details will be displayed:
- Total interactions
- Calls in progress
- Failed calls
- Completed calls
- Overall progress
- Failed count
- Success count
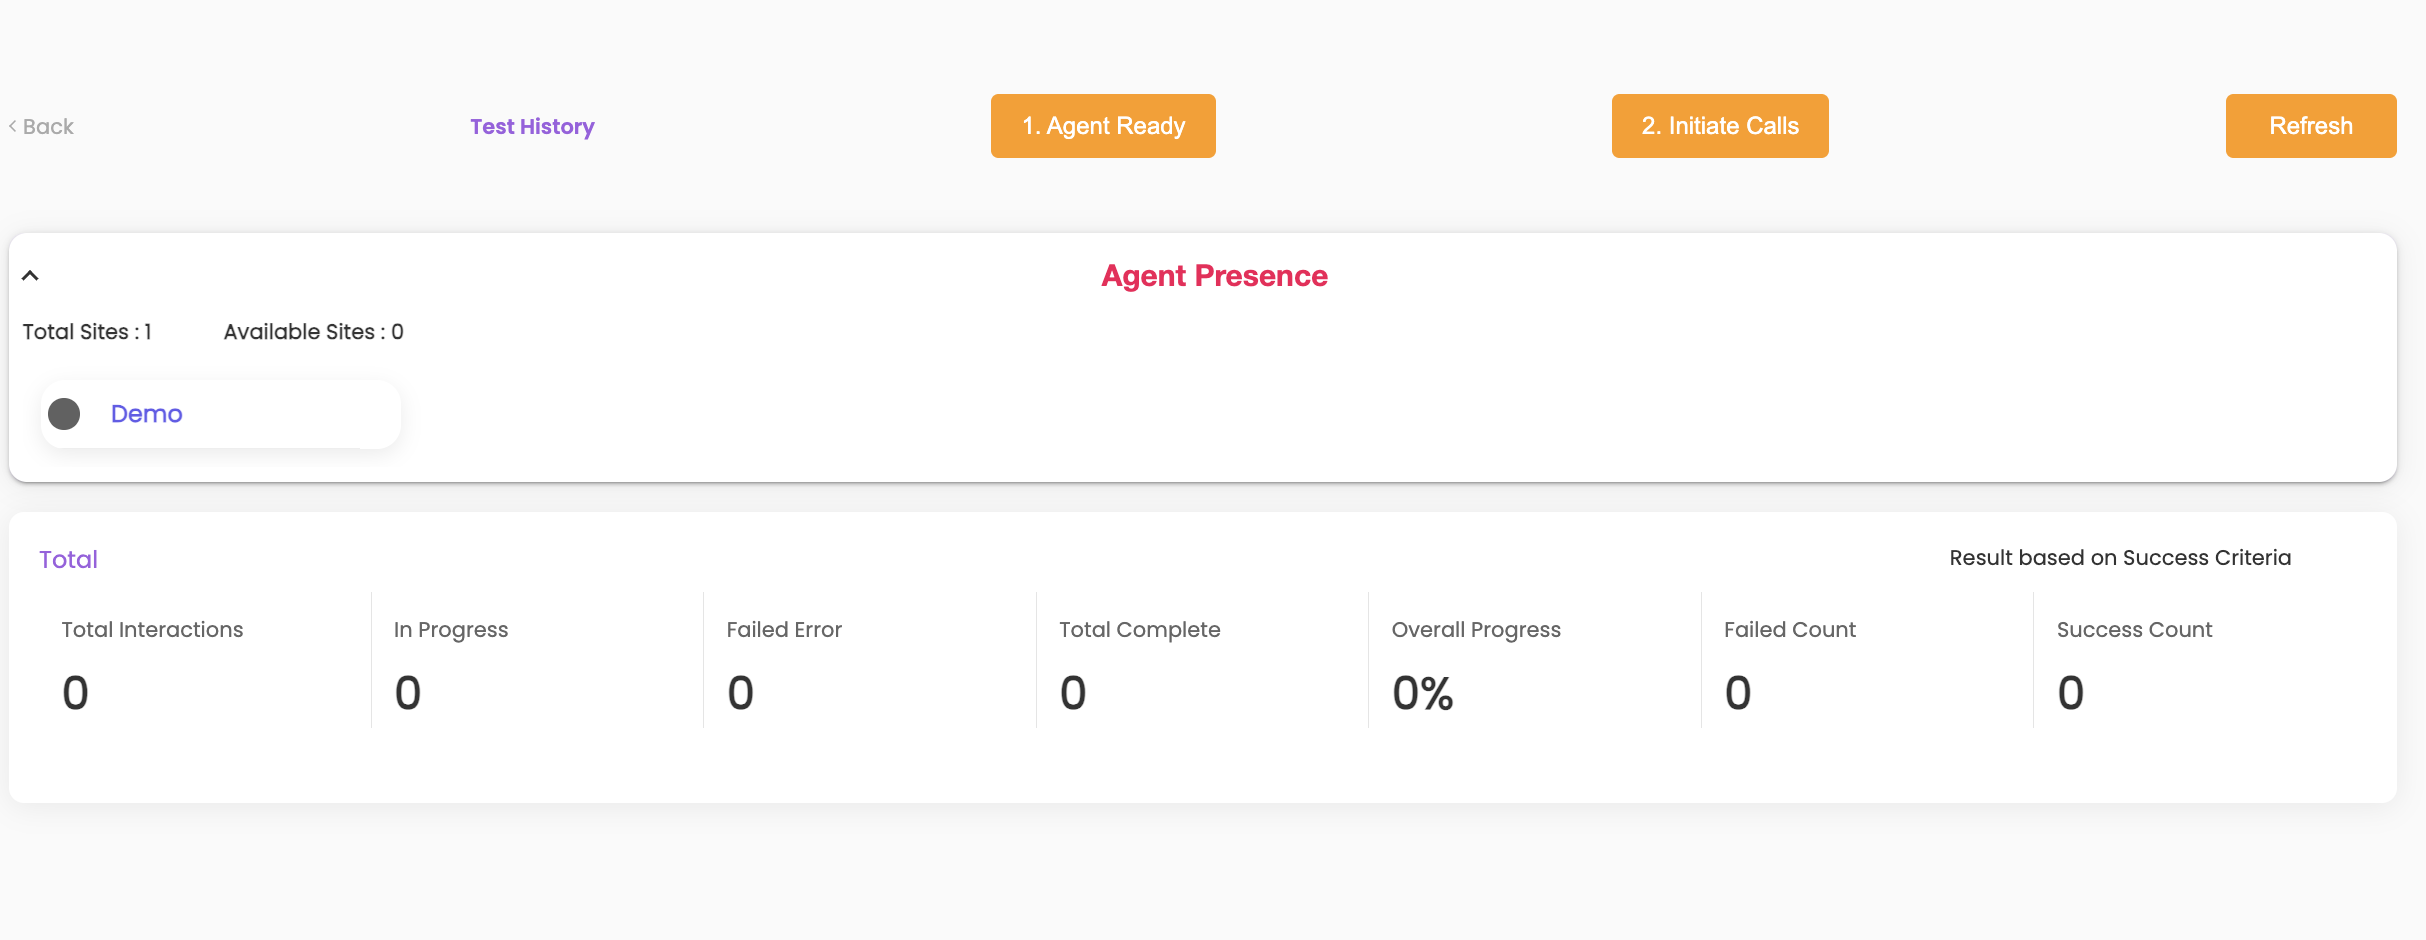
3. Click on Test History and click on the TestID.
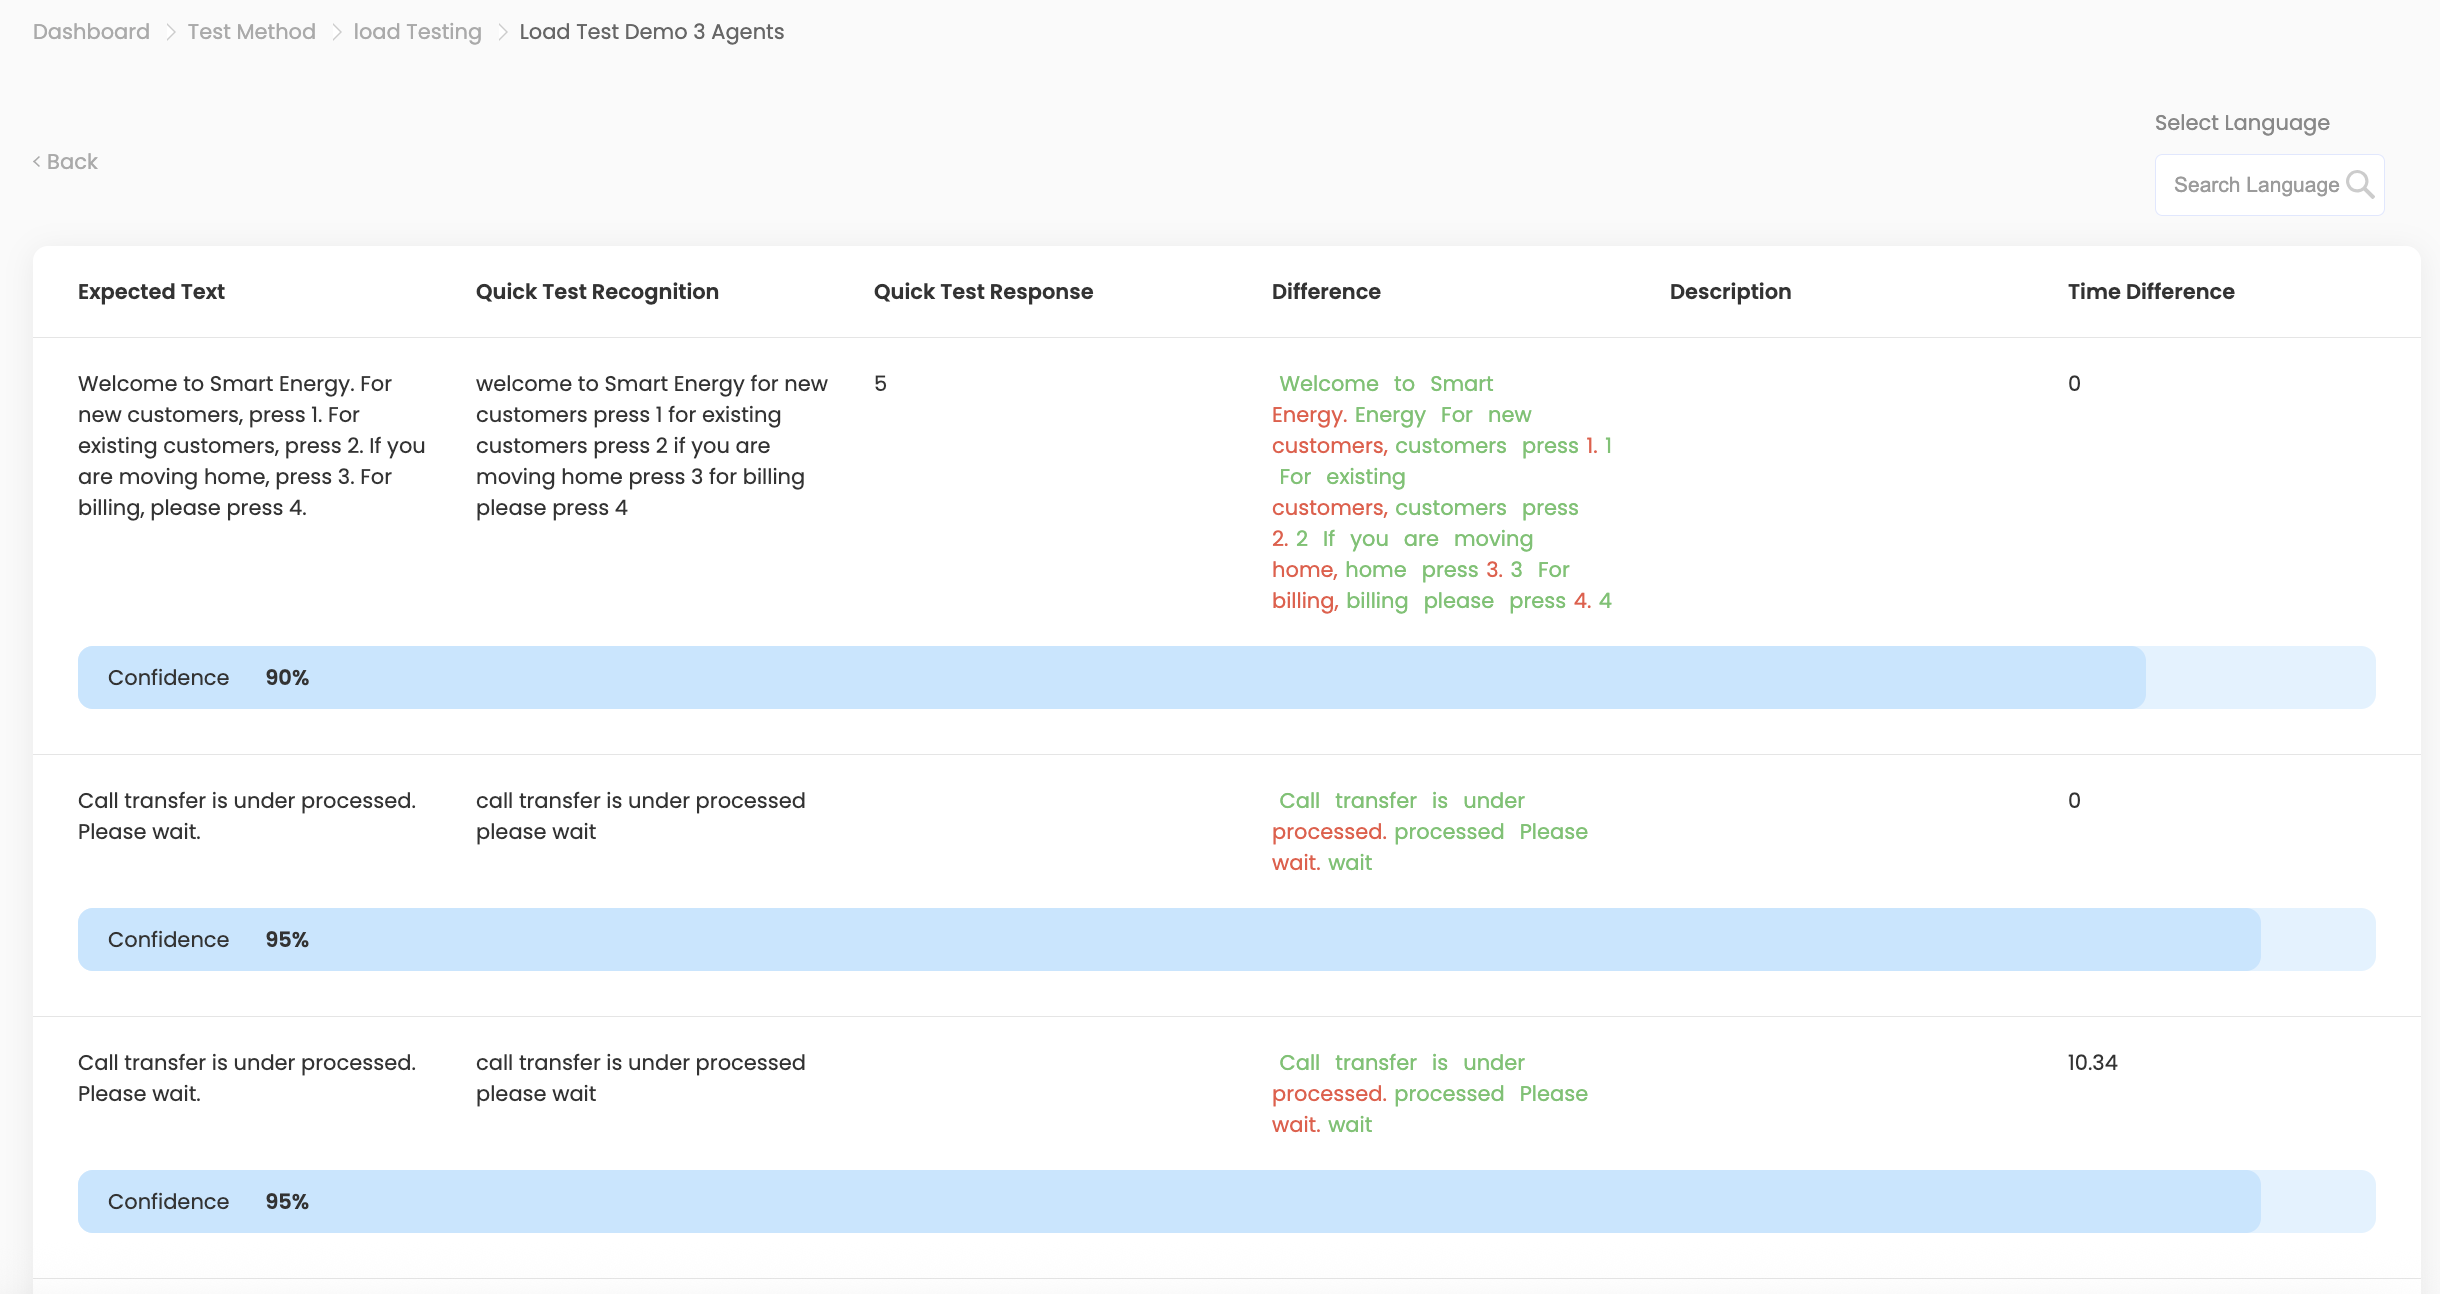
3. Drill down further by clicking on the Client ID to see:
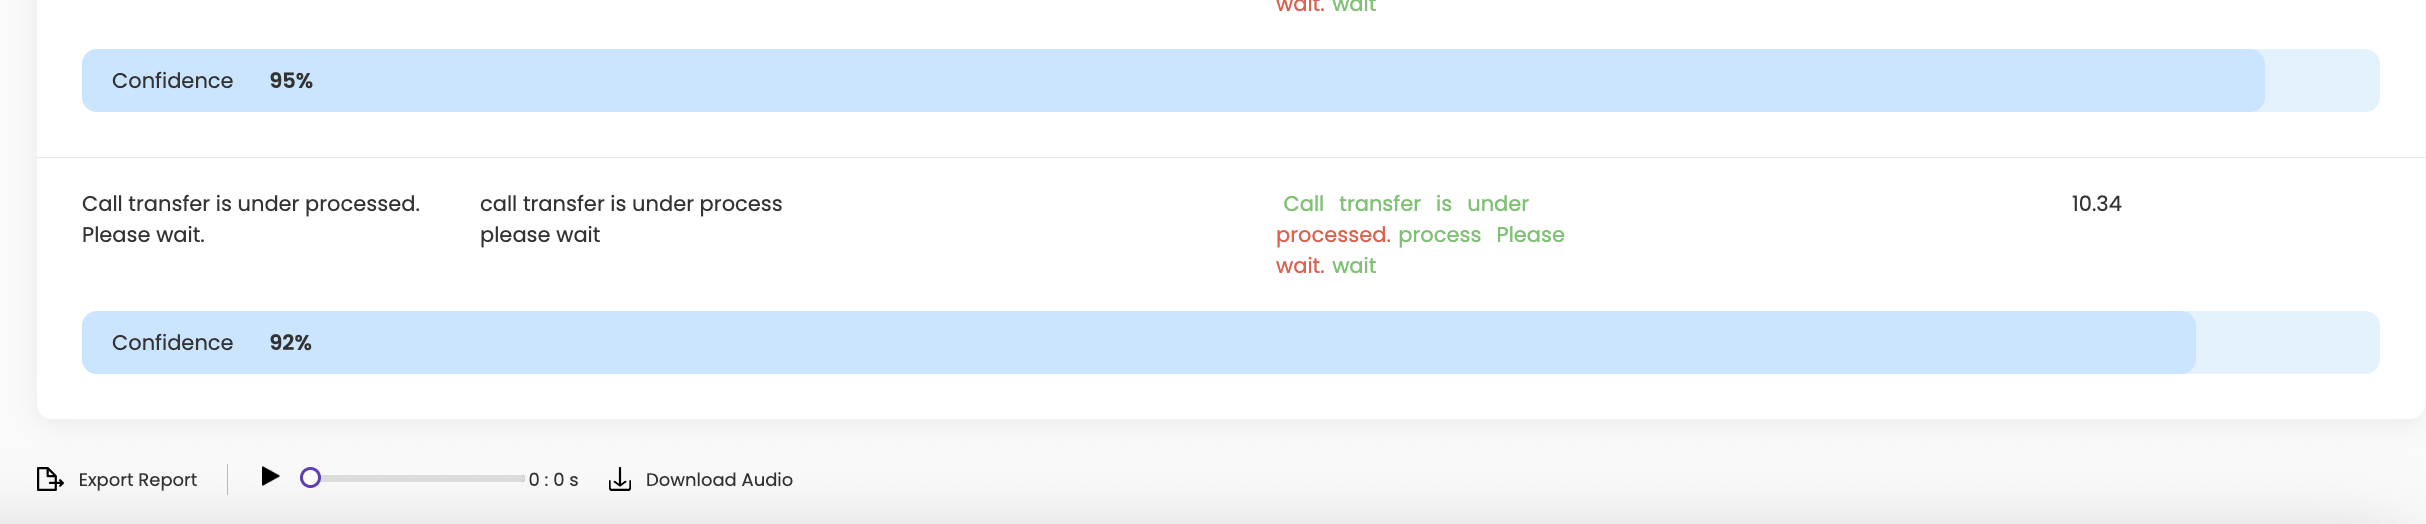
- Client ID, Load Name, Sprint Name, Channel Name, Result, Executed On, Average Confidence
- Detailed differences, time differences
3. Export and download audio:
- Export the report for later use
- Download and listen to audio recordings if needed